Pages

Showing posts with label 30 minutes. Show all posts

Sunday, January 25, 2015

Pasta and Cheese

I think it's unfair to call mac and cheese "mac and cheese." I don't think I've eaten an actual macaroni noodle since my freshman year of college (because Easy Mac is so quintessentially dorm food). The best "mac and cheese" is made from fancier noodles (my personal favorite is cavatappi, but rotini is a close second). Anyway, this is pasta and cheese, the recipe for which I took from here. (Basically, I cut it in half and added bacon.)


Pasta and Cheese

Ingredients
1/2 lb pasta (I used rotini)
1/4 cup butter
1/4 cup flour
2 cups milk
3 cups shredded cheese (I used white Cheddar)
salt and pepper
another 1 T butter
1/4 cup panko crumbs
few Tbsp Parmesan
garlic powder
bacon

Equipment
saucepan, pot, pan, stove (and three burners that function at the same time), colander, 9"x13" pan, oven

Instructions
Preheat the oven to 350F. Cook pasta according to package instructions. Start cooking some bacon*. While that's happening, melt the 1/4 cup of butter in the saucepan, sprinkle in the flour and whisk it together. Let it cook for 2 minutes. In the meantime, start the 1 Tbsp butter melting in a pan. Once melted, add the panko crumbs, Parmesan, and a little garlic powder. Stir often until they get golden brown and toasted. Gradually add the milk, whisking as you go until it's smooth. Add the cheese a small handful at a time, letting each one melt before adding the next. Salt and pepper to taste. Drain the pasta and add it to the cheese mixture. Chop up your bacon and stir it in. Pour the whole thing into a greased 9"x 13" pan. Top with the toasted panko. Bake for 12-15 minutes.

*If you cook your bacon on the stove or in an oven, I would strongly recommend making the bacon beforehand. I was raised making bacon in the microwave so that's how I did it. If you try frying the bacon on the stove while you do everything else, you'll have four burners going at once and one of them will be spitting bacon grease at you. If you make it in the oven, you could throw off your oven preheating for baking the pasta at the end.

Yields
3-4 servings

Total time
About 30 minutes

Cleanup rating 6/10
What a pain. Pan, pot, another pan, plus a baking dish. Two of them with cheese all over the place.

Flavor rating 8/10
YUM. Delicious. I haven't eaten homemade pasta and cheese in a very long time. It's a bit of an ordeal to make compared to a lot of the stuff I post here, but totally worth it.

Difficulty rating 6/10
The difficult part of this recipe is doing many things at once. Boiling water for pasta and preheating an oven are easy enough, but you also have to make sure you don't burn flour, milk, cheese, or panko crumbs, while the pasta doesn't boil over. It's quite a bit to keep track of compared to what I normally do for dinner.

Adjustability: high
You can put just about anything you want in your pasta and cheese. I wanted bacon, so I used bacon. I considered broccoli but instead made peas to go with it. You could put other meats or vegetables or whatever in it. You could use any cheese you want. I had some Monterey Jack in the fridge too, and if I had more of it, I would have used Gouda. And, of course, use whatever pasta you want. I like rotini because it holds the cheese in the little grooves.

Make it with...
See the adjustability section, I guess. It's pasta and cheese... it goes with just about everything.

Tuesday, December 2, 2014

Chicken and Onions

I didn't take a picture of this dinner, but I've made it several times before. In fact, I was surprised to find that I hadn't posted it here before.

Chicken and Onions

Ingredients
two boneless, skinless chicken breasts
one large onion, sliced
olive oil
salt, pepper, paprika, garlic powder

Equipment
oven

Instructions
Preheat the oven to 450F. Line a baking dish with foil (this recipe can stick to a pan and hold on for dear life). Put the chicken and the sliced onions in the dish and drizzle with olive oil. Toss to coat. Sprinkle with seasonings of your choice (I like garlic on everything, and paprika gives it a nice color). Bake for about 30 minutes.

Yields
2 servings

Total time
30 minutes

Cleanup rating 3/5 if you use foil
If you don't use foil, have fun scrubbing onion bits off your dish. Been there; done that. Now I only make this dish with foil.

Flavor rating 7/10
Sometimes I overcook this. Sometimes I undercook it. When I get it right, it's a 7/10. When I don't, it's like a 3.

Difficulty rating 2/10
So simple. Surprising, considering I just admitted to screwing it up sometimes.

Adjustability: medium
You can add other veggies, or use different seasonings, but that's about all there is to it.

Make it with...
This time I made it with rice in the rice cooker that I added shredded gouda to (try it, it's great). You can make it with mashed potatoes, or noodles, or any veggie side dish... it's really versatile, because it really just boils down to being chicken, seasoned however you want.

Kitchenventory
Cabinet: nothing
Fridge: chicken breasts
Countertop: onion, olive oil
Spice rack: seasonings
Miscellaneous: foil

Sunday, November 23, 2014

Beer Mushrooms

You know what's awesome? Beer. You know what else is awesome? Mushrooms. But guess what wasn't double-awesome? These beer mushrooms. They were okay.

Beer + mushrooms = beer mushrooms

That's them, on the right, with beer brats and potatoes.

Ingredients
8 oz mushrooms
2 Tbsp butter
1/2 cup beer
salt and pepper

Equipment
skillet, stove

Instructions
Melt butter in a skillet. Add mushrooms. Add beer. Cook for about 30 minutes, letting the mushrooms absorb all the beer. Salt and pepper to taste.

Yields
3-4 servings

Total Time
about 30 minutes

Cleanup rating 2/5
The thing about making something with a lot of butter and leaving it in the pan while you eat dinner is that it gets that fatty stuff all over the pan. I think it's kind of gross, but it's easy to clean up.

Difficulty rating 2/10
Patience factors into difficulty, which is the only reason this isn't a 1/10.

Flavor rating 3/10
Meh. I like mushrooms. I like beer. (At least, I like the beer I used for this.) I didn't really like this.

Adjustability: low
Use a different beer (the original recipe recommended a stout, maybe that was part of my problem) or use different mushrooms, maybe add some other herbs/seasonings, but that's about all you can do.

Make it with...
I made this to go along with French onion soup, sauteed beer brats with garlic, and potatoes (they were sliced this time to make them cook a little faster). You could make them with just about anything... chicken, pork, beef, vegetarian meals, whatever.

Saturday, October 25, 2014

Game of Thrones Dinner: Honeyed Chicken and Spiced Squash

I know, I disappeared from this blog for a while... Sorry! But I haven't been cooking as much because I've been doing... everything else.

Last Saturday, Beth and Chris and I entered a cosplay contest at Tidewater Comicon... and we won best group! In celebration of our cosplay (Melisandre, Margaery, and Oberyn) I wanted to make an easy dinner for everyone from the Inn at the Crossroads. I wanted to make olive bread but the timing didn't work out very well, so this is what we wound up with:


I made a pressed-for-time (some might call it "lazy") version of Honeyed Chicken. I cheated and used pre-made rotisserie chickens, but I made the sauce. I also made Spiced Squash with it (I used the modern recipe, but used butternut squash that was growing in the yard so I wouldn't have to buy acorn squash). And to pull it all together, I threw together a green salad out of what the in-laws had growing outside: a couple different types of lettuce, spinach, tomato, and some red onion Birk chopped up while I was out picking everything else.

Sauce for Honeyed Chicken

Ingredients
1/2 cup apple cider vinegar
1/3 cup honey
dash of mint (I had to use dried)
handful of raisins
1 Tbsp butter

Equipment
saucepan, spoon, measuring cup, stove

Instructions
Combine everything in a pan and cook until the raisins start to plump. Pour it over the chicken when it's done. (Yes, it's that simple!)

Yields
I actually doubled the recipe since, as you can see in the photo, I had two chickens. (I was channeling the Hound, I guess.) But the recipe makes plenty for one full chicken.

Total time
For the sauce, maybe 10 minutes total. I was reheating the chickens so that took about 30 minutes.

Cleanup rating 2/5
I expected something with this much honey to be a huge mess, but it wasn't bad. I recommend cleaning out your pan pretty quickly though, because it does that thing where the fat floats on the top if you don't use all the sauce, and I think that's kinda gross. And rinse out your measuring cup with really hot water right after you measure the honey, and that'll be less of an issue later.

Difficulty rating 2/10
It's a really simple recipe. Even if you had to roast a chicken from scratch, I wouldn't put this over a 5/10. The timing is easy, the cooking is easy... you do need to be able to keep an eye on it, but I had Birk around for that.

Flavor rating 6/10
I thought it was a little heavy on the apple cider vinegar, but everyone else said it was good. I think it went really well with the already-seasoned rotisserie chicken, so the flavor plays well with others. And I'm pretty sure some of the vinegariness went away as the sauce cooled.

Adjustability: low
Other than adding herbs, I don't know how I could change this, but I also don't know why I would. It's basic and yummy.

Make it with...
Obviously, chicken. I don't see any reason you couldn't make it with turkey instead. I wouldn't use it with other meats, or with anything other than poultry.


Spiced Squash

Ingredients
a squash (I used butternut)
1/2 cup maple syrup
1/4 tsp nutmeg
1 tsp cinnamon
1/4 tsp allspice (I skipped this because we didn't have any)

Equipment
sauce pan, stove, baking sheet, oven

Instructions
Cut up the squash into approximately 1" pieces. Preheat the oven to 375F. Heat the maple syrup in a pan with the spices for about 3 minutes, stirring constantly (do not let it boil). Remove it from the heat. Arrange your squash pieces on a baking sheet (I highly recommend lining it with foil first). Pour the sauce over the squash, coating the pieces as evenly as possible. Bake until tender, about 20 minutes. If you managed to reserve any sauce, heat it in the last few minutes and pour it over the squash when you take it out of the oven.

Yields
Two fairly big butternut squashes fed me and five friends, and the sauce was just the right amount.

Total time
This only took about half an hour, with Birk cutting up the squash while I worked on the sauce for the chicken.

Cleanup rating 2/5
Not bad, but you are heating maple syrup in a pan. I'd recommend using all the sauce on the squash to begin with, and cleaning the pan immediately, while the squash is in the oven. And if you follow my advice about lining the baking sheet with foil, it'll make it 10x better.

Difficulty rating 3/10
I learned that butternut squash is pretty tough to cut; it's kind of like a sweet potato. Beyond that, this is a very simple recipe... it's like a sweet version of my potatoes!

Flavor rating 7/10
I don't eat a lot of squash, but maybe I should start. This was really good. It's excellent for fall weather! I think I might mount an effort to get squash everywhere instead of pumpkin. (Nothing against pumpkin, I'm just not a big fan of it in everything... just pie, really.)

Adjustability: low
There are only so many spices that would go well on a squash, and there are only so many types of squash, and that's all you could really change, because that's all you're using.

Make it with...
Of course, I made it with the honeyed chicken, which was an amazing combination. But I think you could make it with anything that you consider a fall or winter meal. It's a side dish that plays well with others. And it's an excellent and easy vegan dish if you have guests with dietary considerations at the holidays. (It's also gluten-free unless you have a really weird maple syrup.)


Wednesday, July 2, 2014

Cheesesteaks

I'm pretty sure I've never been to Philadelphia (therefore, if I have, I don't remember it) so go easy on me here, okay? I just like sandwiches. Don't try to tell me this isn't a proper cheesesteak... I'm from the south; I'm not expected to get these things right.


Cheesesteaks

Ingredients
green pepper
onion
mushrooms
ground beef
sliced provolone
bolillo rolls
about 2 Tbsp butter

Equipment
pan, foil, baking sheet, stove, oven

Instructions
Cut up your veggies into pieces that are an appropriate size to put on a sandwich. (I mention this specifically because I made mine a little big... they shrink a little while they cook, but not that much.) Melt butter in a pan and cook the veggies on medium-high until they start to get little char marks on them. Move the veggies to a bowl to wait while you cook the ground beef thoroughly in the pan. Drain your ground beef (I set out a paper plate covered in paper towels and pour the meat onto it, pat it down with a couple more paper towels) and put it back in the pan. Add the veggies back to the pan and mix thoroughly. Turn the heat to low. Once the veggies are heated through, spread the mixture evenly in the pan and cover with slices of provolone. Preheat the oven to 250F. Once the cheese is melted, scoop the mixture into sliced bolillo rolls. Wrap each sandwich very very tightly in foil and set on the baking sheet. Bake for about 10 minutes.

Yields 
I got 5 sandwiches out of one package of ground beef, one pepper, one onion, and a few button mushrooms. If we had used bigger rolls, it would have been 4.

Total time
about 30 minutes

Cleanup rating 1/5
Using one pan for the veggies and the meat makes cleanup even easier. Since the sandwiches are wrapped tight in foil, they don't leak onto the pan, so that doesn't even need to be cleaned.

Difficulty rating 2/10
These are not hard... they're just a little more time-consuming than a sandwich usually is. I was playing on hard-mode because my thumb hurt (have you ever cut your thumb by opening shampoo? I have) but still... not hard.

Flavor rating 6/10
Pretty good. I feel like there's something missing, or maybe I just should have used actual steak, but they were good.

Adjustability: high
Switch up your veggies! Change your cheese! Use steak instead of ground beef! Try chicken or pork or turkey instead! Use a different bread! Season your meat with something crazy! Every ingredient can be changed, removed, or switched out for something else. You could even go against everything Philly stands for and just put the mixture on top of rice or mashed potatoes or something, I don't know.

Make it with...
I made potatoes, and I had some green beans on stand-by to make sauteed green beans if the timing was a little off (but it wasn't). I thought about potato chips, potato salad, something with avocado (I just couldn't decide what)... it's a sandwich! Make whatever you want with it.

Bonus photos:


Veggies should look pretty much like this when they're done sauteeing.
Look at the little brown bits on some of them! YUM.

Cheese is just about melted over the meat-and-veggie mixture.
Almost time to transfer to the rolls.

Monday, June 23, 2014

Croutons

My grandma (mom's mom) made the best homemade croutons. This is not her recipe. In fact, I don't think I have her recipe. But it's not the same if she didn't make them, y'know? These are my croutons... and they're rarely the same twice in a row, so it's one of those vague recipes.


Croutons

Ingredients
bread (I like baguettes for this)
olive oil
seasonings (these have garlic powder, paprika, shallot-pepper seasoning, and salt)

Equipment
foil, baking sheet, oven, bowl

Instructions
Preheat oven to 375F. (I like my croutons a little chewy. If you like crispier croutons, change that to 425F.) Cube your bread and put into the bowl. (Smaller cubes = crispier croutons.) Drizzle with olive oil; toss until evenly coated. Sprinkle with seasonings; toss until evenly coated. Spread evenly on a foil-lined baking sheet and bake for 15-30 minutes (check on them periodically; baking time is entirely up to you and your crunchiness preferences).

Yields
Depends on how much you cut up. I used half a demi-baguette to make what you see above.

Total time
20-30 minutes, depending on how long you want them to bake

Cleanup rating 1/5
Clean the bowl, toss the foil.

Difficulty rating 3/10
I was going to make it a 2/10 but then I remembered that one time I nearly cut off a finger because the knife slipped when I was cutting the bread, and I was very thankful that I'm terrible about sharpening my knives. So, you know... be careful with your knife. I'm serious.

Flavor rating 9/10
You can make them exactly the way you want, as far as seasoning, doneness, and size are concerned, and I love that. Plus they taste fresh, as opposed to the pre-packaged ones that now taste like over-flavored cardboard to me.

Adjustability: high
Cut them smaller or bigger, bake them less time or more, use whatever seasonings you want, add cheese or some other topping, use a different bread like cheese bread or jalapeno bread or olive bread or rye bread... go totally nuts on these things.

Make it with...
Well, I traditionally just put them on salads, but they make a great snack on their own, too. When I was in Paris last summer, we went to a cooking class where we made skate Grenobloise-style, which calls for lemon juice, capers, and croutons to garnish the skate, so that's something I had never done with croutons before. (Hers were cooked in butter in a skillet, too... but stay tuned for a recipe for croutons like that soon!)

Tuesday, June 17, 2014

Rocky Road Cookies

These were so good. So sweet, but so good. Kind of like the GoT finale I made them for.


Rocky Road Cookies

Ingredients
3 cups powdered sugar
2/3 cup cocoa powder (unsweetened)
1/4 tsp salt
3 large egg whites
1 Tbsp vanilla extract
2 cups semisweet chocolate chips
2.5 oz sliced almonds (I used slivered because that's what I had)
1 cup mini marshmallows

Equipment
large bowl, baking sheet, parchment paper, oven, MUSCLES, freezer

Instructions
Preheat oven to 350F. In a large bowl, mix up your powdered sugar and cocoa. Whisk in the salt. Add the egg whites and vanilla; stir until combined. Stir in chocolate chips and almonds. (This is where the muscle comes in... it's a thick batter.) Spoon small mounds onto parchment paper and top with a few marshmallows (press them in a little to make sure they don't tumble off). Stick them in the freezer for a few minutes to prevent too much spreading when they bake. Put on a baking sheet (I didn't think it was a good idea to freeze the baking sheet itself) and bake about 12 minutes (until marshmallows are toasted like in the photo). Let them cool a few minutes on the pan before transferring to wire rack.

Yields
2 dozen cookies

Total time
about 30 minutes (I baked two batches, so about 10 minutes prep, and about 10 minutes for each batch to bake)

Cleanup rating 3/5
Chocolate everywhere. Powdered sugar more everywhere.

Difficulty rating 6/10
I'm not kidding about stirring that batter... it's thick. Don't be lazy about it, though; you want evenly distributed bits. And someone save you if you think whisking your wet ingredients in is a good idea. Your whisk will pick up all of the batter and be rendered useless.

Flavor rating 8/10
Really sweet but really yummy. Kind of sticky.

Adjustability: medium
Don't like almonds? Use pecans, or walnuts, or no nuts at all. Try mixing some marshmallows into the batter. Try cinnamon chips or butterscotch chips or caramel bits or toffee chips. I know rocky road has a specific definition but I've always thought of it as the "everything bagel" of desserts.

Make it with...
Nothing; it's a cookie. Our dinner was burgers and hot dogs on the grill with veggies. This seemed like an appropriately casual dessert for the occasion.

Wednesday, May 14, 2014

Sauteed Apples and Pork Medallions with Pan Sauce

If that doesn't sound like the fanciest dinner I've made so far, I don't know what does.

The only thing I think I would change is that I was dice the apples to get a more thorough cooking. The first 1/4" or so got cooked fine, but if I had waited for the whole halves to get cooked through, the bottom would have become mush. I already made some changes to the original while I was cooking.

As you can see in the photo, I made potatoes (with cumin and garlic powder this time) and peas to go with this.


Sauteed Apples & Pork Medallions with Pan Sauce

Ingredients
2 Granny Smith apples, halved
2 pork medallions (or you can slice your own pork tenderloin, about 1/4" thick)
2 Tbsp flour
1/2 tsp cumin
salt & pepper
1 Tbsp minced garlic
1 Tbsp oil (I used vegetable oil)
1 Tbsp butter
1/2 cup chicken broth
1 Tbsp white wine vinegar

Equipment
stove, pan with high-ish sides, have your plates ready

Instructions
Put oil and butter in pan on medium heat. Sprinkle your apples with salt & pepper on the cut sides. In the meantime, mix flour, cumin, and some salt & pepper. Lightly coat the pork medallions and set aside. Once butter is melted, stir it up and add apples, cut-side down. Cook until they look approximately like the picture (about 5 minutes). Remove them and put on plates. Add pork medallions to the pan and cook about 4-5 minutes on each side (until done). Set aside on plates. Add chicken broth and white wine vinegar to the pan and scrape up any bits from the bottom. After about a minute, add minced garlic and cook for another 2-3 minutes until it reduces a bit. Pour pan sauce over pork and serve.

Yields
2 servings

Total time
about 30 minutes (although I started the potatoes earlier, because they took about 45 minutes)

Cleanup rating 2/5
One of the amazing things about making a pan sauce (other than the incredible flavor it yields) is that deglazing the pan does the "hard" work of cleaning the pan for you! Instead of scrubbing off all the little bits afterward, you just put delicious liquid into the pan and it turns those bits into food! Although, with all the oil and apple juice and broth and meat juices and butter going on, there was quite a bit of splatter (I may have used a bit too much oil) so that made a little bit of a mess.

Difficulty rating 4/10
Actually quite easy. The hardest thing was trying to determine when things were done. I'm pretty sure I've never cooked pork (which is weird, but chicken is just so easy) and I've certainly never sauteed apple halves, so I was a little lost the whole time. Cubing the apples would have made the whole thing a lot easier.

Flavor rating 7/10
YUM. The apples were a little weird (again, they only got half-cooked I think, so cubing would help... or at least slicing). But the pork was very good, and the pan sauce was delicious. (I added the garlic on a whim, and I'm ever so glad that I did. I would probably have added a  little finely diced onion if I had remembered that there was half an onion in the fridge. And maybe used a splash of wine too.)

NEW CATEGORY!!!
Adjustability: high
Obviously, I've already mentioned that the apples were too big. And that I messed with the pan sauce quite a bit (and would do so even more in the future). So this new category will help consolidate all of these ideas. Low adjustability means I don't think I would change anything, or I don't know how. Medium adjustability means I could change one or two things, or I wouldn't change it very much. High adjustability means the possibilities are endless, and/or I have lots of ideas of what to change in future attempts.

NEW CATEGORY!!!
Make it with
This category will tell you what I did make to go with the recipe, or what I might consider making with it. I already mentioned that this one was made with potatoes (with cumin and garlic) and peas. I might also make rice, and any green vegetable you like... broccoli might be good.

Tuesday, May 13, 2014

Accidental Cookies

So, remember how I was making a ton of Mothers' Day cookies? Well, I screwed up the dough for the raspberry cookies (I forgot to add the sugar... thank goodness I tasted the dough before folding in the raspberries!). I tried to go back and add the sugar and re-mix it, but it turned into a firm dough ball that would not take raspberries well. So I saved it until later, and made these "accidental" cookies! Then I decided that they needed a little something... so I made a lime icing.


Accidental Cookies with Lime Icing

Ingredients
1/2 cup sugar
2 cups flour
2 tsp baking powder
8 Tbsp (1 stick) butter, not softened, cubed
2/3 cup heavy whipping cream
lime juice (about 2 Tbsp? I didn't measure)
powdered sugar (about 1/2 cup? I didn't measure)

Equipment
baking sheet, parchment paper, mixer, oven

Instructions
Preheat oven to 350F. Mix flour and baking powder together. Add butter and knead together by hand. You should get a crumbly mixture. Add the heavy cream and mix thoroughly (with a spoon should be fine). Add the sugar (if you want to be exactly like me, swear loudly about forgetting to add the sugar in the first place). Knead really thoroughly until all the sugar is incorporated. Pinch off small balls of dough and place on parchment-paper-lined baking sheet. Bake about 15 minutes. Let them cool thoroughly on a cooling rack. Mix lime juice and powdered sugar, adjusting amounts until you have the consistency of icing you want. Drizzle over cookies.

Yields
I got about 2 dozen cookies

Total time
Hard to tell, since I made these around making the raspberry cookies, but probably about 30 minutes including 15 minutes baking time.

Cleanup rating 2/5
Any time I'm working with powdered sugar will be no lower than a 2/5. But the dough is really clean, because it's a firm ball of dough instead of a crumbly mess.

Difficulty rating 5/10
Kneading by hand is a pain in the butt. Especially since I did it twice in a row (this batch, then doing it correctly for the raspberry cookies). And getting the icing consistency right is tricky.

Flavor rating 6/10
Birk says the cookies have a biscuit-y feel/flavor, and I don't disagree. But I like them, and it means they aren't too sweet. The lime icing is pretty tart, and I like that too. I feel like this recipe has some tweaking in its future.

Sunday, May 11, 2014

Gluten-Free Chocolate Cookies

These are the cookies I made for my stepmom! She's gluten-free, and she loves chocolate, so I jumped on this recipe when I found it.


Gluten-Free Chocolate Cookies

Ingredients
1/2 cup butter (softened)
1/2 cup brown sugar
1/2 cup white sugar
1 egg
1 tsp vanilla
1/2 tsp baking soda
1/2 tsp salt
1 cup cocoa powder
1/2 cup chocolate chips
1/2 cup butterscotch chips

Equipment
oven, baking sheets, parchment paper, cooling racks, mixer

Instructions
Preheat oven to 350F. Mix together butter, brown sugar, and white sugar. Add egg and vanilla; mix thoroughly. Combine baking soda, salt, and cocoa powder, and mix into wet batter (be careful not to make chocolate clouds that choke you). Stir in the chocolate and butterscotch chips. They will expand while baking, so give them some room on the parchment-lined baking sheet (about 1-1.5" should do). Bake for 10-12 minutes.

Yields
I got about 15 cookies out of it, but they were pretty big cookies.

Total time
A little under 30 minutes.

Cleanup rating 3/5
Chocolate everywhere. Delicious batter that I know I shouldn't lick off the spoon and beaters and bowl because it has raw egg, but yummy anyway. Definitely an instance of "clean immediately or regret it."

Difficulty rating 5/10
Not hard, but there is skill and patience required when baking cookies. Mixing, measuring carefully, fully incorporating ingredients... it might help to know that I use a hand mixer, so it's a tiny bit trickier than using a stand mixer.

Flavor rating 3/10
Disappointment. I hope my stepmom liked them more than I did. They are INCREDIBLY sweet. And I have an insane sweet tooth... but this is ridiculous. I washed down a bite with some Coke and it made the Coke taste bland like water. Still, though... chocolate. So it's not like a 1 or 2.

Additional note: The original recipe called for white chocolate chips instead of butterscotch ones, and mentioned that you can also add 1/2 cup of chopped walnuts (which I had, leftover from Mom's walnut butter balls, but I was fairly certain that my stepmom and I agree that nuts are great but they don't belong in our baked goods).

Sunday, May 4, 2014

Raspberry Lime Cookies

I promised cookies for a party. I made brown sugar cookies last week, intending the same thing, but I missed the gathering, so I ate a lot of the cookies myself. And I'm making the brown sugar cookies again for a work thing next week. So I thought I should probably make something different for tonight! (And I made them early enough that if they turned out badly, I still had time to make... brown sugar cookies.)


Raspberry-Lime Cookies

Ingredients
2 cups fresh raspberries
juice of 1/2 a lime (or 1.5 Tbsp ReaLime)
1.5 Tbsp sugar
another 1/2 cup sugar
2 cups flour
2 tsp baking powder
8 Tbsp (1 stick) butter, cubed (not softened)
2/3 cup heavy whipping cream
3/4 powdered sugar
1.5 Tbsp milk

Equipment
oven, cookie sheet, parchment paper, cooling racks, two bowls (one small, one large)

Instructions
Preheat oven to 350F. In a small bowl, combine raspberries, lime juice, and 1.5 Tbsp sugar. In a large bowl, whisk together flour, 1/2 cup sugar, and baking powder. Add the butter and mix together with your hands (it should be a crumbly mixture when you're done). Add cream and mix together. Fold in raspberries (try your best not to smush them, but a little smushing is inevitable). Line a cookie sheet with parchment paper and put spoonfuls of batter about 1" apart. Bake for 15 minutes (I left them for another 2 or 3 minutes, but I'd check on them at 15, anyway.) Let them cool on cooling racks. Mix powdered sugar and milk together and drizzle on cooled cookies.

Yields
I got nearly 2 dozen cookies, and a few of my spoonfuls were a little big.

Total time
I had to make two batches (only one rack in the oven right now) so it took an extra 15 minutes, but it takes about 30 minutes overall.

Cleanup rating 4/5
I made a mess... you might make less of a mess. But I got raspberry juice, lime juice, flour, and powdered sugar everywhere. It helped that I put parchment paper under the cooling racks before adding the icing, but there was still quite a mess to clean up.

Difficulty rating 4/10
You need to be able to mix the flour mixture with the butter properly (not too lumpy), not destroy the raspberries, not over- or under-bake them... etc. Plus, you should make sure each spoonful has an appropriate mixture of dough and berries and is cohesive enough to stay a cookie.

Flavor rating 6/10
They're a little tart (possibly because I changed the original recipe I found from lemon juice to lime juice, and I used ReaLime instead of a... real lime) but they're still pretty good. Maybe a little less lime juice, or a little more sugar in the first step?

Saturday, May 3, 2014

Avocado Chicken

As is often the case, this is from a recipe online that I adapted to suit my own abilities/tastes/preferences/available ingredients.


Avocado Chicken

Ingredients
2 chicken breasts
1 Tbsp olive oil
seasoning (I used sate from Penzey's)
2 avocados
about 1 Tbsp minced garlic
about 1 Tbsp lime juice
about 1 tsp cilantro
rice, to serve with

Equipment
stove (2 burners)

Instructions
Make your rice (I used the 2 cups of water, 1 cup of rice, 1 Tbsp of butter in a saucepan method). While that's going on, make your chicken (like this) with your seasoning of choice. While you're waiting on both of those, cut and scoop your avocados and put them into a bowl. Run a knife through them a few times to approximately dice them. Add the garlic, cilantro, and lime juice (and some salt) and mix it up. (Don't mix too much or it will turn to a paste instead of a relish-like consistency.) Once everything is done cooking, serve the avocado on top of the chicken on top of the rice.

Yields
2 servings (easily scalable)

Total time
about 30 minutes (rice took 20 minutes, everything else happened while that was cooking)

Cleanup rating 2/5
You just have the chicken pan, avocado bowl, and rice pan to clean.

Difficulty rating 3/10
The chicken is easy, the rice is stupidly easy, and the avocado is easy. And you don't have to get the timing exactly perfect either!

Flavor rating 8.5/10
YUMMMMMMMMM. I loved this. The only change Birk suggested was to add beans (which I'm not a big fan of unless they're baked beans served with hot dogs). I thought maybe adding some cumin to the chicken or making Mexican saffron rice instead of the plain white rice would be good too.

So, happy pre-Cinco-de-Mayo, everyone! I had mine with a Cuba Libre; I highly recommend that.

Wednesday, April 23, 2014

Butter Chicken

Last night, I made two Indian dishes for dinner. It was a bit of an undertaking for a mid-week dinner, but hey, there are sufficient leftovers for a complete second meal!

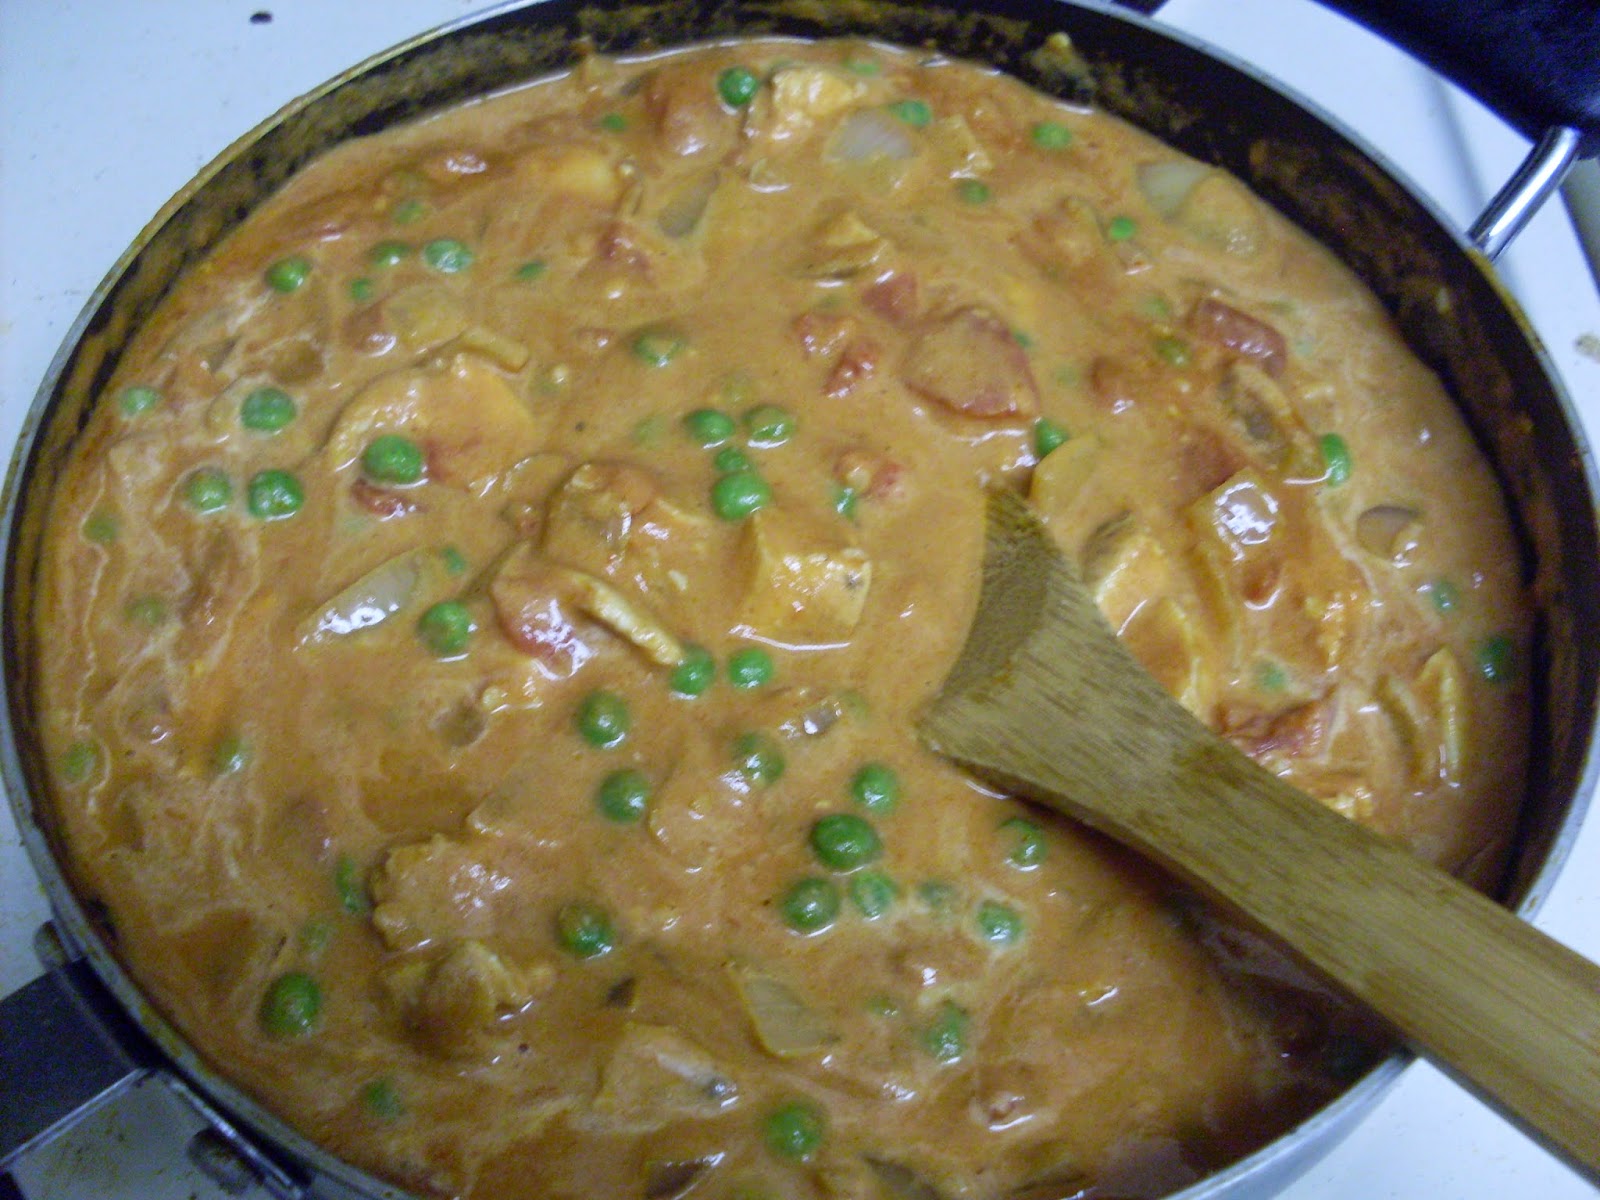
The main dish was butter chicken (which has so much more tomato in it than anything else, I think it should be called tomato chicken). I found a recipe online and made my own adjustments to it, so I know this is like... Alex-ized butter chicken. Go with it.


Butter Chicken (which I think should be called tomato chicken)

Ingredients
3 chicken breast filets
garam masala
coriander
ground ginger
cinnamon
2 tsp minced garlic
8 oz peas (I got a steam-in bag and nuked them)
3 Tbsp butter
15 oz can of diced tomatoes in juice
14.25 oz can of tomato sauce
1 Tbsp tomato paste
1/3 cup heavy whipping cream
1/2 an onion, diced

Equipment
skillet, stove

Instructions
Cook your chicken. Technically this should be made with baked or rotisserie or tandoori chicken, but I made mine like this but with garam masala and some salt. Take out your chicken and let it cool and absorb its juices for a while. (This is time I spent paying attention to the samosa filling.) Dice your onion. Melt butter in the pan and add onion, cooking until they're golden. Add the garlic, tomato paste, and about 1/2 tsp each of garam masala, coriander, ginger, and cinnamon. Stir constantly for a few minutes, until well blended. Add the diced tomatoes and tomato sauce, mix thoroughly, let it heat through. Add the chicken and let it heat through. Add the peas and cream, mix thoroughly, let it heat through but don't boil.

Yields
SO MUCH. Probably about six servings.

Total time
30 minutes if you're making it by itself*

Cleanup rating 3/5
It can be a messy dish, but it's mostly tomato sauce so it comes off fairly easily when you clean it right after dinner.

Difficulty rating 4/10
There are a lot of ingredients to keep track of, but if you play the cooking show game (set out all your ingredients ahead of time) it's a lot easier.

Flavor rating 7/10
I had never had butter chicken before, so I don't know how accurate I was, but I thought it was good. I think we could do without the diced tomatoes (I like tomato sauces but not pieces of tomato) so I'll probably experiment with this one in the future.

*I made this with samosa filling so it actually took about an hour to make dinner.

Thursday, March 27, 2014

Sweet-and-Spiced Chicken

Birk suggested chicken. I couldn't decide how to flavor it. I turned to Pinterest. This is what I adapted from what I found.

With oven potatoes - with onion thrown in this time! - and peas... and red wine.

Sweet-and-Spiced Chicken

Ingredients
Chicken breasts (I actually bought the tenderloins because I wanted them to bake faster)
Light brown sugar (about 2 Tbsp)
Cumin (1 tsp)
Paprika (1 tsp)
Garlic powder (1 tsp)
Onion powder/flakes (ours is dried minced onion) (1 tsp)
Oregano, dried (1 tsp)

Equipment
Oven, bowl for dredging, baking sheet with a rim

Instructions
Preheat the oven to 425F. Line your rimmed baking sheet with foil (trust me on this one) and spray it with Pam or your favorite equivalent. Wash and pat dry your chicken. In a bowl, mix together the sugar and your spices. Break up the brown sugar so that it's more powdery than it is clumpy. Dredge your chicken pieces in the mixture and lay them on the baking sheet. Bake for about 20 minutes if you're using chicken breasts; 12 if they're tenderloins. (Obviously check them for doneness.) The brown sugar will burn, but mine didn't burn ON the chicken... it sort of ran off and made a puddle shape outlined with burnt sugar, but there wasn't an iota of burnt sugar on the chicken. So maybe turn on a fan or something before you take it out of the oven, if you have a super-sensitive smoke alarm like ours.

Yields
Well, how much chicken did you use? Scalable.

Total time
This took about 30 minutes, what with preheating and baking. (Prep takes less time than the preheating.)

Cleanup rating 1/5
If you don't use the foil and the spray, you'll have a 6/5 on cleanup. But with the foil, all the cleanup you need is to throw away the foil and dump out the remainder of your sugar/spice mixture (you put raw chicken in it, don't you dare use it for anything else).

Difficulty rating  3/10
Dredging the chicken and getting it evenly coated when you aren't using a sticking agent like a beaten egg can be tricky (make sure the spices don't settle in the bowl and hide under the sugar) and you have to get the timing right on removing it from the oven (chicken needs to be done, but sugar shouldn't be too burnt) but it's pretty straightforward. If you get chicken cut the way you like it, you don't even need a knife.

Flavor rating 7/10
Yum! It was different, and I think I could probably tweak the spices a little bit, but overall, quite good.