This is my new favorite food. (No offense, popcorn.) I could write many long paragraphs about how amazing this food is, but I'm going to skip that so you can get to making it - and therefore, eating it - much sooner. Only one disclaimer: It's cheater bulgogi. I've been trying to find a word that's the equivalent of "gringo" to Korean, because that's what it feels like.
(Cheater) Bulgogi
Recipe adapted from here
1/3 cup brown sugar
1/4 cup soy sauce
1 T sesame oil
1/2 t crushed red pepper flakes
1/4 t ground ginger
3 cloves minced garlic
1 pound ground beef (less fat, the better)
2 green onions, thinly sliced
In a small bowl, whisk together the first 5 ingredients. Heat the oil in a skillet, add garlic and cook for a minute (stirring). Add ground beef and brown it, then drain the fat. Add the sauce mixture and the green onions, and mix well, heating through.
(Cheater) Kimchi
Recipe adapted from here
1 can sauerkraut
sesame oil
sesame seeds
chili powder
minced garlic
lemon juice
Drain the sauerkraut in a colander, and rinse it really well in running cold water. Let it drain for a while; pat it with a paper towel if it's still really wet. Lightly coat in sesame oil (while still in colander). Transfer to a bowl and add a handful of sesame seeds; mix. In a small bowl, combine a handful of chili powder, nearly the same amount of minced garlic, and about a teaspoon of lemon juice (less if you used liquid from the minced garlic). Mix it into a paste and add to the sauerkraut, mixing to thoroughly coat. Let it sit for a while (in the refrigerator is best) to combine flavors.
(Cheater) Bibimbap
white rice
bulgogi recipe above
kimchi recipe above
cucumbers, carrots, mushrooms (whatever vegetables of your choice)
eggs
This is the order I make everything in to get the timing as close to perfect as possible:
- Make rice and set aside. (Keep covered to keep warm.) While the rice is cooking, I chop up vegetables (cucumbers and, if not pre-shredded, carrots).
- Make the kimchi and put it in the fridge to combine flavors.
- I like toasting my mushrooms in butter, so at this point I melt butter in a pan while chopping up mushrooms very small, and cooking them in the butter until they're darker. (It smells AWESOME.)
- While the mushrooms are cooking, I mix up the sauce for the bulgogi.
- I keep the mushroom pan hot while I start another pan for the beef. Once the beef is drained, I add the sauce to it and I start frying eggs in the mushroom pan. It's okay for the beef/sauce to stay warm a few extra minutes while I finish up eggs.
- Now you can assemble everything! Rice on the bottom, veggies and kimchi around the side in little piles, beef in the middle, fried egg on top! And don't forget, you're supposed to mix it all up to eat it! (Personally, I like to compose individual bites to create more variety, but you do you.)
Notes:
- This makes EXCELLENT leftovers. I never thought something with rice could make good leftovers. I usually only have rice, beef, and cucumbers leftover, but I can fry a new egg if I'm eating the leftovers at home, and I could start making way more mushrooms so there can be some leftover.
- This is crazy customizable. You can put more/less of whatever ingredient(s) you (dis)like.
Showing posts with label difficulty:draw. Show all posts
Friday, September 11, 2015
Saturday, February 21, 2015
Couscous Cakes
Couscous Cakes
adapted from here
Instructions
1 cup cooked couscous
2 eggs
about 3 T panko bread crumbs
parsley, basil, salt, pepper, garlic powder
3 T olive oil
Equipment
saucepan, saute pan, stove
Instructions
Lightly beat the eggs. Mix the cooked couscous in with the eggs until incorporated. If it seems too thin, add the panko crumbs a little at a time, mixing thoroughly to see if you need more. Add the seasonings and mix thoroughly. Heat the oil in a pan. Form the couscous mixture into cakes with damp hands and drop carefully into the pan. Cook until browned on each side (about 5-7 minutes per side for me).
Yields
I got five out of this much mixture
Total time
Including cooking the couscous, about 15 minutes
Cleanup rating 3/10
Not including the pot you cooked the couscous in, all you have is a bowl that you mixed in and the pan of oil.
Difficulty rating 4/10
The trickiest skill required is knowing how much of the panko you need to mix in. It's not even hard to flip the cakes, if you wait until they're done on the first side.
Flavor rating 5/10
This is the simple, basic version. The original recommended including chopped pistachios, which I didn't have and I didn't think would go too well with the seared tuna and sauteed green beans, so I left them out. I would definitely recommend putting SOMETHING in them, and if you don't, go a little heavy on the salt, or serve them with some kind of sauce on them.
Adjustability: high
You can put all sorts of things in these, as long as they're small (or chopped fine) enough to not break up the structural integrity of the cakes. Pistachios or other chopped nuts, peas or chopped pieces of broccoli, asparagus, carrot, or other veggies, small pieces of meat like chicken, bacon, or ground beef... the possibilities are endless. You can also change the seasonings to whatever you want, and serve it with any kind of sauce (to match whatever you put inside them or serve it with).
Make it with...
I started off thinking I'd just make some sushi rice to go with our tuna, then I thought I'd try making rice pilaf, and then Birk suggested couscous or quinoa. So anything you'd make a grain with, you can make these with.
Labels:
15 minutes,
adjustability:high,
cleanup:easy,
difficulty:draw,
eggs,
flavor:draw,
meatless,
side,
stove
Sunday, January 25, 2015
Pasta and Cheese
I think it's unfair to call mac and cheese "mac and cheese." I don't think I've eaten an actual macaroni noodle since my freshman year of college (because Easy Mac is so quintessentially dorm food). The best "mac and cheese" is made from fancier noodles (my personal favorite is cavatappi, but rotini is a close second). Anyway, this is pasta and cheese, the recipe for which I took from here. (Basically, I cut it in half and added bacon.)
Pasta and Cheese
Ingredients
1/2 lb pasta (I used rotini)
1/4 cup butter
1/4 cup flour
2 cups milk
3 cups shredded cheese (I used white Cheddar)
salt and pepper
another 1 T butter
1/4 cup panko crumbs
few Tbsp Parmesan
garlic powder
bacon
Equipment
saucepan, pot, pan, stove (and three burners that function at the same time), colander, 9"x13" pan, oven
Instructions
Preheat the oven to 350F. Cook pasta according to package instructions. Start cooking some bacon*. While that's happening, melt the 1/4 cup of butter in the saucepan, sprinkle in the flour and whisk it together. Let it cook for 2 minutes. In the meantime, start the 1 Tbsp butter melting in a pan. Once melted, add the panko crumbs, Parmesan, and a little garlic powder. Stir often until they get golden brown and toasted. Gradually add the milk, whisking as you go until it's smooth. Add the cheese a small handful at a time, letting each one melt before adding the next. Salt and pepper to taste. Drain the pasta and add it to the cheese mixture. Chop up your bacon and stir it in. Pour the whole thing into a greased 9"x 13" pan. Top with the toasted panko. Bake for 12-15 minutes.
*If you cook your bacon on the stove or in an oven, I would strongly recommend making the bacon beforehand. I was raised making bacon in the microwave so that's how I did it. If you try frying the bacon on the stove while you do everything else, you'll have four burners going at once and one of them will be spitting bacon grease at you. If you make it in the oven, you could throw off your oven preheating for baking the pasta at the end.
Yields
3-4 servings
Total time
About 30 minutes
Cleanup rating 6/10
What a pain. Pan, pot, another pan, plus a baking dish. Two of them with cheese all over the place.
Flavor rating 8/10
YUM. Delicious. I haven't eaten homemade pasta and cheese in a very long time. It's a bit of an ordeal to make compared to a lot of the stuff I post here, but totally worth it.
Difficulty rating 6/10
The difficult part of this recipe is doing many things at once. Boiling water for pasta and preheating an oven are easy enough, but you also have to make sure you don't burn flour, milk, cheese, or panko crumbs, while the pasta doesn't boil over. It's quite a bit to keep track of compared to what I normally do for dinner.
Adjustability: high
You can put just about anything you want in your pasta and cheese. I wanted bacon, so I used bacon. I considered broccoli but instead made peas to go with it. You could put other meats or vegetables or whatever in it. You could use any cheese you want. I had some Monterey Jack in the fridge too, and if I had more of it, I would have used Gouda. And, of course, use whatever pasta you want. I like rotini because it holds the cheese in the little grooves.
Make it with...
See the adjustability section, I guess. It's pasta and cheese... it goes with just about everything.
Labels:
30 minutes,
adjustability:high,
cleanup:draw,
difficulty:draw,
flavor:win,
oven,
pasta,
side,
stove
Thursday, January 8, 2015
Chicken Lazone
I had never heard of chicken lazone before, but I ran across a recipe here and thought it sounded too easy and delicious not to try. It was good, but I think I need to make it again and let the sauce thicken a little longer and it would be perfect.
Chicken Lazone
Ingredients
2 thin boneless, skinless chicken breasts (either cut in half lengthwise or pounded flat)
garlic powder
onion powder
chili powder (I didn't have this, so I used taco seasoning... close enough!)
1 cup heavy cream
2 T and 2 T butter
Equipment
skillet, stove
Instructions
Season your chicken breasts on both sides with the three spices. Melt 2 T of butter in the pan and cook the chicken on both sides until done. Melt the remaining 2 T of butter around the chicken and pour in the cream. (If necessary, scrape up any seasoning that has stuck to your pan and incorporate it.) Cook for about 8 minutes until sauce thickens.
Yields
2 servings (two chicken breasts)
Total time
about 20 minutes
Cleanup rating 4/10
This rating was arrived at because I was a responsible adult and cleaned the pan immediately after eating dinner. Don't let this one sit. My sauce was thin enough that the little bit left in the pan just went down the sink drain, and it's only one pan so it's not too bad.
Flavor rating 6/10
Birk liked it more than I did, but it did grow on me the more I ate. Like I said at the top, I think I should have let the sauce thicken more.
Difficulty rating 5/10
It doesn't take a very long time, it's almost the same as my basic chicken recipe but with a sauce component added to the end, and the skills necessary are pretty simple (recognizing when chicken is done and when sauce is thickened).
Adjustability: medium
You can switch up the spices and maybe add vegetables or cheese or something. It's hard to say with this one.
Make it with...
I made this with garlic mashed potatoes (the sauce was delicious on them) and a recipe I'm about to post, kale and onion saute. Everything went really well together. The original recipe showed the chicken and sauce being served over a long noodle like spaghetti, which would probably be really good too.
Cost
Chicken, heavy cream, butter, and the spices all belong in my kitchenventory, so the garlic mashed potatoes (about $2) were the only thing I bought that I don't normally have on hand.
Chicken Lazone
Ingredients
2 thin boneless, skinless chicken breasts (either cut in half lengthwise or pounded flat)
garlic powder
onion powder
chili powder (I didn't have this, so I used taco seasoning... close enough!)
1 cup heavy cream
2 T and 2 T butter
Equipment
skillet, stove
Instructions
Season your chicken breasts on both sides with the three spices. Melt 2 T of butter in the pan and cook the chicken on both sides until done. Melt the remaining 2 T of butter around the chicken and pour in the cream. (If necessary, scrape up any seasoning that has stuck to your pan and incorporate it.) Cook for about 8 minutes until sauce thickens.
Yields
2 servings (two chicken breasts)
Total time
about 20 minutes
Cleanup rating 4/10
This rating was arrived at because I was a responsible adult and cleaned the pan immediately after eating dinner. Don't let this one sit. My sauce was thin enough that the little bit left in the pan just went down the sink drain, and it's only one pan so it's not too bad.
Flavor rating 6/10
Birk liked it more than I did, but it did grow on me the more I ate. Like I said at the top, I think I should have let the sauce thicken more.
Difficulty rating 5/10
It doesn't take a very long time, it's almost the same as my basic chicken recipe but with a sauce component added to the end, and the skills necessary are pretty simple (recognizing when chicken is done and when sauce is thickened).
Adjustability: medium
You can switch up the spices and maybe add vegetables or cheese or something. It's hard to say with this one.
Make it with...
I made this with garlic mashed potatoes (the sauce was delicious on them) and a recipe I'm about to post, kale and onion saute. Everything went really well together. The original recipe showed the chicken and sauce being served over a long noodle like spaghetti, which would probably be really good too.
Cost
Chicken, heavy cream, butter, and the spices all belong in my kitchenventory, so the garlic mashed potatoes (about $2) were the only thing I bought that I don't normally have on hand.
Sunday, January 4, 2015
Skillet Potatoes
I cam here thinking I was just going to post a nice picture of tonight's dinner, but I discovered - to my surprise - that I had not yet posted the recipe for skillet potatoes! So instead, that's what you get tonight. I also made chicken (with Parmesan and salt and pepper and garlic powder) and zucchini (with Parmesan and salt and pepper and dried garlic and dried onion) but the recipe is skillet potatoes, which are... just amazing. I'm astonished that I haven't posted this yet.
Equipment
microwave-safe bowl, microwave, skillet, stove
Instructions
Peel and dice your potatoes and put them in the microwave-safe bowl. Toss them with a tablespoon of oil and some salt. Microwave for 10 minutes, stirring after each minute or two. Add minced garlic and onions and toss. Heat a tablespoon of oil in a skillet and add potatoes. Cook for a few minutes until they start to brown, then stir/flip until potatoes are browned and your life is delicious.
Yields
two big servings (I really like potatoes... a whole skillet of these sounds like a serving to me)
Total time
about 20 minutes
Cleanup rating 2/5
You have a couple dishes to do here (cutting board, microwave bowl, skillet, etc.) and they're all oily, but it isn't that bad.
Flavor rating 9/10
Have I ever given anything a 10/10? If so, this is probably a 10 instead of 9. It's really amazing and delicious and makes me so happy.
Difficulty rating 6/10
You have to be very present (taking something out of the microwave and stirring it every minute for ten minutes takes a lot of attention, plus the whole skillet thing requires a bit of presence).
Adjustability: low
Other than adding seasonings or maybe some other vegetables, there isn't much else you can do to this. The original said you could use red potatoes instead but I like peeling Yukon golds.
Make it with...
Everything. Or nothing. Just make them. Always. Now. Go make them. Right now.
Skillet Potatoes
Adapted from here
Ingredients
a pound of Yukon gold potatoes (that was about 5 of them)
half an onion, diced
1 Tbsp and 1 Tbsp of vegetable oil
salt
1 Tbsp minced garlic
Equipment
microwave-safe bowl, microwave, skillet, stove
Instructions
Peel and dice your potatoes and put them in the microwave-safe bowl. Toss them with a tablespoon of oil and some salt. Microwave for 10 minutes, stirring after each minute or two. Add minced garlic and onions and toss. Heat a tablespoon of oil in a skillet and add potatoes. Cook for a few minutes until they start to brown, then stir/flip until potatoes are browned and your life is delicious.
Yields
two big servings (I really like potatoes... a whole skillet of these sounds like a serving to me)
Total time
about 20 minutes
Cleanup rating 2/5
You have a couple dishes to do here (cutting board, microwave bowl, skillet, etc.) and they're all oily, but it isn't that bad.
Flavor rating 9/10
Have I ever given anything a 10/10? If so, this is probably a 10 instead of 9. It's really amazing and delicious and makes me so happy.
Difficulty rating 6/10
You have to be very present (taking something out of the microwave and stirring it every minute for ten minutes takes a lot of attention, plus the whole skillet thing requires a bit of presence).
Adjustability: low
Other than adding seasonings or maybe some other vegetables, there isn't much else you can do to this. The original said you could use red potatoes instead but I like peeling Yukon golds.
Make it with...
Everything. Or nothing. Just make them. Always. Now. Go make them. Right now.
Labels:
20 minutes,
adjustability:low,
cleanup:easy,
difficulty:draw,
flavor:win,
meatless,
microwave,
potato,
side,
stove
Monday, July 21, 2014
Olive Bread
Beth and Chris and Christopher made this (among other delicious things) for my bachelorette party. Several weeks back, Tara mentioned how good it was, and something along the lines of how you can't find bread like that in stores or anything. So I thought I'd make some to bring for dinner this past weekend!
Olive Bread
| Ignore the Little Visitor Damson... Turns out I forgot to take a photo of just the bread. |
Olive Bread
from Inn at the Crossroads
Ingredients
6.5 cups flour
1.5 Tbsp yeast
1.5 Tbsp kosher salt
1 Tbsp honey
1/4 cup olive oil
2 3/4 cup lukewarm water
1 cup chopped pitted Kalamata olives
1 sprig chopped rosemary
1/4 cup corn meal
Equipment
LARGE bowl, plastic wrap, oven, baking sheet
Instructions
In the bowl, combine 1/2 cup of the flour, yeast, and 1 cup of the water. Let it sit for 10 minutes. (I used this time to chop the olives up.) Add the salt, honey, oil, rest of the flour and water. Mix (I used a spoon) until the dough starts to come together; add olives and rosemary. Keep mixing until all the loose flour is incorporated. Cover loosely with plastic wrap. Let it rise for 1.5 hours. (It's supposed to expand a lot, so have a bowl big enough for that! Mine didn't expand THAT much, but I spilled some yeast...)
Dust two baking sheets with corn meal. Divide the dough (it should be sticky) into pieces (I did half; if yours rises more, thirds works too) and pull the edges under until you have a ball-shape. Set them on the baking sheets. Let them rise another 30 minutes while you preheat the oven to 450F. Slash the tops with a serrated knife (I totally forgot to do this and it wasn't devastating). Place them in the oven and bake for 30 minutes. The crust should be medium brown (see photo) and firm (I tapped it with a table knife and got a lovely hollow-ish sound).
Yields
I made two loaves; I believe when Beth made it, she got three.
Total time
about 3 hours
Cleanup rating 4/5
The dough is sticky, both of my loaves stuck a tiny bit to the pan, and you have to measure some messy stuff (I got flour everywhere, somehow, and honey is always a pain, though delicious).
Difficulty rating 6/10
For bread, this is insanely easy. It's a no-knead bread, and I managed to ace it on my first try, so it really is ridiculous how easy it is... for bread. But it's an involved process with lots of steps, and whenever you're baking, you have to be very accurate with your measuring.
Flavor rating 8/10
I love this stuff. But I like olives. Birk doesn't like olives; he isn't fond of this bread. Should go without saying, I suppose. The original post says you won't have a single bite without an olive bit in it, and I have found this to be absolutely true. You've got a basic white bread with a great crust (not thick, not hard) and salty little olive bits everywhere, and a hint of rosemary.
Adjustability: low
Maybe someone who's more accustomed to making bread would be able to adjust this recipe more, but this is the first time I've made real bread. (Sure, I made that honey beer bread, but that felt more like a hybrid biscuit-and-cake.) Maybe there are other things with similar density to olives that you could put in the dough? Use something other than rosemary to flavor it? I'm not really sure.
Make it with...
By chance, it went perfectly with what we had for dinner Saturday (a sausage-tomato-cream sauce on rigatoni). It's also a wonderful stand-alone snack. If I were having a wine-and-cheese party, I'd slice this up and set it right next to the cheese plate. It's a hearty bread but not terribly filling, so it goes with a ton of things.
Ingredients
6.5 cups flour
1.5 Tbsp yeast
1.5 Tbsp kosher salt
1 Tbsp honey
1/4 cup olive oil
2 3/4 cup lukewarm water
1 cup chopped pitted Kalamata olives
1 sprig chopped rosemary
1/4 cup corn meal
Equipment
LARGE bowl, plastic wrap, oven, baking sheet
Instructions
In the bowl, combine 1/2 cup of the flour, yeast, and 1 cup of the water. Let it sit for 10 minutes. (I used this time to chop the olives up.) Add the salt, honey, oil, rest of the flour and water. Mix (I used a spoon) until the dough starts to come together; add olives and rosemary. Keep mixing until all the loose flour is incorporated. Cover loosely with plastic wrap. Let it rise for 1.5 hours. (It's supposed to expand a lot, so have a bowl big enough for that! Mine didn't expand THAT much, but I spilled some yeast...)
Dust two baking sheets with corn meal. Divide the dough (it should be sticky) into pieces (I did half; if yours rises more, thirds works too) and pull the edges under until you have a ball-shape. Set them on the baking sheets. Let them rise another 30 minutes while you preheat the oven to 450F. Slash the tops with a serrated knife (I totally forgot to do this and it wasn't devastating). Place them in the oven and bake for 30 minutes. The crust should be medium brown (see photo) and firm (I tapped it with a table knife and got a lovely hollow-ish sound).
Yields
I made two loaves; I believe when Beth made it, she got three.
Total time
about 3 hours
Cleanup rating 4/5
The dough is sticky, both of my loaves stuck a tiny bit to the pan, and you have to measure some messy stuff (I got flour everywhere, somehow, and honey is always a pain, though delicious).
Difficulty rating 6/10
For bread, this is insanely easy. It's a no-knead bread, and I managed to ace it on my first try, so it really is ridiculous how easy it is... for bread. But it's an involved process with lots of steps, and whenever you're baking, you have to be very accurate with your measuring.
Flavor rating 8/10
I love this stuff. But I like olives. Birk doesn't like olives; he isn't fond of this bread. Should go without saying, I suppose. The original post says you won't have a single bite without an olive bit in it, and I have found this to be absolutely true. You've got a basic white bread with a great crust (not thick, not hard) and salty little olive bits everywhere, and a hint of rosemary.
Adjustability: low
Maybe someone who's more accustomed to making bread would be able to adjust this recipe more, but this is the first time I've made real bread. (Sure, I made that honey beer bread, but that felt more like a hybrid biscuit-and-cake.) Maybe there are other things with similar density to olives that you could put in the dough? Use something other than rosemary to flavor it? I'm not really sure.
Make it with...
By chance, it went perfectly with what we had for dinner Saturday (a sausage-tomato-cream sauce on rigatoni). It's also a wonderful stand-alone snack. If I were having a wine-and-cheese party, I'd slice this up and set it right next to the cheese plate. It's a hearty bread but not terribly filling, so it goes with a ton of things.
Labels:
3 hours,
adjustability:low,
baking,
bread,
cleanup:hard,
difficulty:draw,
flavor:win,
meatless,
oven,
side
Tuesday, June 17, 2014
Rocky Road Cookies
These were so good. So sweet, but so good. Kind of like the GoT finale I made them for.
Rocky Road Cookies
Ingredients
3 cups powdered sugar
2/3 cup cocoa powder (unsweetened)
1/4 tsp salt
3 large egg whites
1 Tbsp vanilla extract
2 cups semisweet chocolate chips
2.5 oz sliced almonds (I used slivered because that's what I had)
1 cup mini marshmallows
Equipment
large bowl, baking sheet, parchment paper, oven, MUSCLES, freezer
Instructions
Preheat oven to 350F. In a large bowl, mix up your powdered sugar and cocoa. Whisk in the salt. Add the egg whites and vanilla; stir until combined. Stir in chocolate chips and almonds. (This is where the muscle comes in... it's a thick batter.) Spoon small mounds onto parchment paper and top with a few marshmallows (press them in a little to make sure they don't tumble off). Stick them in the freezer for a few minutes to prevent too much spreading when they bake. Put on a baking sheet (I didn't think it was a good idea to freeze the baking sheet itself) and bake about 12 minutes (until marshmallows are toasted like in the photo). Let them cool a few minutes on the pan before transferring to wire rack.
Yields
2 dozen cookies
Total time
about 30 minutes (I baked two batches, so about 10 minutes prep, and about 10 minutes for each batch to bake)
Cleanup rating 3/5
Chocolate everywhere. Powdered sugar more everywhere.
Difficulty rating 6/10
I'm not kidding about stirring that batter... it's thick. Don't be lazy about it, though; you want evenly distributed bits. And someone save you if you think whisking your wet ingredients in is a good idea. Your whisk will pick up all of the batter and be rendered useless.
Flavor rating 8/10
Really sweet but really yummy. Kind of sticky.
Adjustability: medium
Don't like almonds? Use pecans, or walnuts, or no nuts at all. Try mixing some marshmallows into the batter. Try cinnamon chips or butterscotch chips or caramel bits or toffee chips. I know rocky road has a specific definition but I've always thought of it as the "everything bagel" of desserts.
Make it with...
Nothing; it's a cookie. Our dinner was burgers and hot dogs on the grill with veggies. This seemed like an appropriately casual dessert for the occasion.
Rocky Road Cookies
Ingredients
3 cups powdered sugar
2/3 cup cocoa powder (unsweetened)
1/4 tsp salt
3 large egg whites
1 Tbsp vanilla extract
2 cups semisweet chocolate chips
2.5 oz sliced almonds (I used slivered because that's what I had)
1 cup mini marshmallows
Equipment
large bowl, baking sheet, parchment paper, oven, MUSCLES, freezer
Instructions
Preheat oven to 350F. In a large bowl, mix up your powdered sugar and cocoa. Whisk in the salt. Add the egg whites and vanilla; stir until combined. Stir in chocolate chips and almonds. (This is where the muscle comes in... it's a thick batter.) Spoon small mounds onto parchment paper and top with a few marshmallows (press them in a little to make sure they don't tumble off). Stick them in the freezer for a few minutes to prevent too much spreading when they bake. Put on a baking sheet (I didn't think it was a good idea to freeze the baking sheet itself) and bake about 12 minutes (until marshmallows are toasted like in the photo). Let them cool a few minutes on the pan before transferring to wire rack.
Yields
2 dozen cookies
Total time
about 30 minutes (I baked two batches, so about 10 minutes prep, and about 10 minutes for each batch to bake)
Cleanup rating 3/5
Chocolate everywhere. Powdered sugar more everywhere.
Difficulty rating 6/10
I'm not kidding about stirring that batter... it's thick. Don't be lazy about it, though; you want evenly distributed bits. And someone save you if you think whisking your wet ingredients in is a good idea. Your whisk will pick up all of the batter and be rendered useless.
Flavor rating 8/10
Really sweet but really yummy. Kind of sticky.
Adjustability: medium
Don't like almonds? Use pecans, or walnuts, or no nuts at all. Try mixing some marshmallows into the batter. Try cinnamon chips or butterscotch chips or caramel bits or toffee chips. I know rocky road has a specific definition but I've always thought of it as the "everything bagel" of desserts.
Make it with...
Nothing; it's a cookie. Our dinner was burgers and hot dogs on the grill with veggies. This seemed like an appropriately casual dessert for the occasion.
Labels:
30 minutes,
adjustability:medium,
baking,
cleanup:draw,
cookies,
dessert,
difficulty:draw,
flavor:win,
meatless,
oven
Monday, June 2, 2014
Lime Cake
Let's talk lime cake. I made this for Game of Thrones night! Everyone said it was good (and I agree). (Apologies for the photo... I forgot to take a picture when it was still whole... so this is the piece I took to work the day after.)
Lime Cake
Ingredients
1 cup sugar
2 1/2 Tbsp butter (room temperature)
2 eggs, well beaten
juice of 1 lime
1 1/2 cups flour
2 1/4 tsp baking powder
powdered sugar
Equipment
mixer, oven, 8"x8" square cake pan
Instructions
Preheat oven to 350F. Cream the sugar and butter. Add the eggs and lime juice and mix thoroughly. Add the flour and baking powder and mix thoroughly. Pour (my experience was more like "drop") into your greased and floured cake pan (I had to spread it evenly with a spoon, so do that if you need to). Bake 25 minutes (inserted toothpick should come out clean). Let it cool for a few minutes in the pan, then turn out onto a cooling rack to finish cooling. Sprinkle with powdered sugar before it's completely cooled (it will stick better if it's a little warm).
Yields
I don't know, an 8"x8" cake.
Total time
About 45 minutes (maybe a little longer if you forgot to get your butter up to room temp before you get started). It takes a little while to get the butter and sugar creamed (unless I'm doing it wrong).
Cleanup rating 2/5
Remember my rule about rating cleanup of things that involve powdered sugar? That applies here. Also, I didn't cool my cake on the cooling rack so it kind of stuck to the plate but still, not a biggie.
Difficulty rating 4/10
The most difficult thing about this recipe is creaming the sugar and butter (not my favorite thing in the world to do). Remember: I use a hand mixer. So that contributes. But you have to get the batter spread evenly in the pan or it's probably not going to turn out well for you.
Flavor rating 8/10
YUM. Everyone seemed pretty happy about this one. It almost totally disappeared, which is a good thing for cake.
Adjustability low
At least, as far as I know, it's low. The original recipe recommended garnishing with chopped peanuts, which I planned on doing, but I had no peanuts. I want to look into some kind of honey sauce I could put on top... but still, options are limited.
Make it with...
My coworker Missi was the lucky recipient of my other leftover piece that came to work with me, and she said it was screaming for coffee (not in the way that it's dry but in the way that it would pair extremely well with coffee). I don't drink coffee, so I wouldn't know, but I'll take her word for it. I think it would go really well with some fresh strawberries too.
Lime Cake
Ingredients
1 cup sugar
2 1/2 Tbsp butter (room temperature)
2 eggs, well beaten
juice of 1 lime
1 1/2 cups flour
2 1/4 tsp baking powder
powdered sugar
Equipment
mixer, oven, 8"x8" square cake pan
Instructions
Preheat oven to 350F. Cream the sugar and butter. Add the eggs and lime juice and mix thoroughly. Add the flour and baking powder and mix thoroughly. Pour (my experience was more like "drop") into your greased and floured cake pan (I had to spread it evenly with a spoon, so do that if you need to). Bake 25 minutes (inserted toothpick should come out clean). Let it cool for a few minutes in the pan, then turn out onto a cooling rack to finish cooling. Sprinkle with powdered sugar before it's completely cooled (it will stick better if it's a little warm).
Yields
I don't know, an 8"x8" cake.
Total time
About 45 minutes (maybe a little longer if you forgot to get your butter up to room temp before you get started). It takes a little while to get the butter and sugar creamed (unless I'm doing it wrong).
Cleanup rating 2/5
Remember my rule about rating cleanup of things that involve powdered sugar? That applies here. Also, I didn't cool my cake on the cooling rack so it kind of stuck to the plate but still, not a biggie.
Difficulty rating 4/10
The most difficult thing about this recipe is creaming the sugar and butter (not my favorite thing in the world to do). Remember: I use a hand mixer. So that contributes. But you have to get the batter spread evenly in the pan or it's probably not going to turn out well for you.
Flavor rating 8/10
YUM. Everyone seemed pretty happy about this one. It almost totally disappeared, which is a good thing for cake.
Adjustability low
At least, as far as I know, it's low. The original recipe recommended garnishing with chopped peanuts, which I planned on doing, but I had no peanuts. I want to look into some kind of honey sauce I could put on top... but still, options are limited.
Make it with...
My coworker Missi was the lucky recipient of my other leftover piece that came to work with me, and she said it was screaming for coffee (not in the way that it's dry but in the way that it would pair extremely well with coffee). I don't drink coffee, so I wouldn't know, but I'll take her word for it. I think it would go really well with some fresh strawberries too.
Labels:
45 minutes,
adjustability:low,
baking,
cake,
cleanup:easy,
dessert,
difficulty:draw,
flavor:win,
meatless,
oven
Thursday, May 29, 2014
Cheesy Sausage Bake
I actually made this a while ago... I just forgot to post it. So here it is!
Cheesy Sausage Bake
Ingredients
smoked sausage, 1 package
1 large onion
1 potato
1/2 bag of baby carrots
olive oil
salt, pepper
paprika
sharp cheddar cheese, shredded
Equipment
oven, foil, roasting pan
Instructions
Preheat oven to 400F. Slice the sausage (about the thickness you see in the photo) and dice your onion and potato. Line a roasting pan with foil and drizzle with a little bit of olive oil, spreading it evenly. Put the sausage, onions, and potatoes into the pan and drizzle with olive oil; mix thoroughly with your hands. Sprinkle with sea salt, pepper, and paprika, and toss again to evenly coat. Spread it evenly in the pan. Bake for 45 minutes (stir every 15 minutes) until potatoes are forkable and golden-brown. Turn off the oven. Sprinkle the cheese evenly across the top and return pan to the oven for a few minutes to melt it.
Yields
about 4 servings
Total time
About an hour (about 15 minutes prep time with chopping and tossing, 45 minutes bake time)
Cleanup rating 2/5
The foil lining makes it easy to clean your pan. If you shred your own cheese, you have to clean the grater, which I see as a bit of a pain, but otherwise there isn't much to it.
Difficulty rating 4/10
You have to be present and paying attention the whole hour, because you need to check in and stir it every 15 minutes.
Flavor rating 6/10
It was good. I wasn't blown away by it, but it was very good.
Adjustability: high
You can add or replace ingredients pretty easily (make sure you don't use something that will devolve to mush unless you add it later in the baking process) and you can add whatever spices you want. I think I actually added garlic... I put garlic in everything.
Make it with
...nothing, unless you want to. You've got your veggies, starch, meat, even some cheese in there. I might make a green veggie on the side (peas, broccoli, a green salad) but I didn't this time.
Ingredients
smoked sausage, 1 package
1 large onion
1 potato
1/2 bag of baby carrots
olive oil
salt, pepper
paprika
sharp cheddar cheese, shredded
Equipment
oven, foil, roasting pan
Instructions
Preheat oven to 400F. Slice the sausage (about the thickness you see in the photo) and dice your onion and potato. Line a roasting pan with foil and drizzle with a little bit of olive oil, spreading it evenly. Put the sausage, onions, and potatoes into the pan and drizzle with olive oil; mix thoroughly with your hands. Sprinkle with sea salt, pepper, and paprika, and toss again to evenly coat. Spread it evenly in the pan. Bake for 45 minutes (stir every 15 minutes) until potatoes are forkable and golden-brown. Turn off the oven. Sprinkle the cheese evenly across the top and return pan to the oven for a few minutes to melt it.
Yields
about 4 servings
Total time
About an hour (about 15 minutes prep time with chopping and tossing, 45 minutes bake time)
Cleanup rating 2/5
The foil lining makes it easy to clean your pan. If you shred your own cheese, you have to clean the grater, which I see as a bit of a pain, but otherwise there isn't much to it.
Difficulty rating 4/10
You have to be present and paying attention the whole hour, because you need to check in and stir it every 15 minutes.
Flavor rating 6/10
It was good. I wasn't blown away by it, but it was very good.
Adjustability: high
You can add or replace ingredients pretty easily (make sure you don't use something that will devolve to mush unless you add it later in the baking process) and you can add whatever spices you want. I think I actually added garlic... I put garlic in everything.
Make it with
...nothing, unless you want to. You've got your veggies, starch, meat, even some cheese in there. I might make a green veggie on the side (peas, broccoli, a green salad) but I didn't this time.
Labels:
60 minutes,
adjustability:high,
cleanup:easy,
difficulty:draw,
dinner,
flavor:draw,
oven,
sausage
Wednesday, May 14, 2014
Sauteed Apples and Pork Medallions with Pan Sauce
If that doesn't sound like the fanciest dinner I've made so far, I don't know what does.
The only thing I think I would change is that I was dice the apples to get a more thorough cooking. The first 1/4" or so got cooked fine, but if I had waited for the whole halves to get cooked through, the bottom would have become mush. I already made some changes to the original while I was cooking.
As you can see in the photo, I made potatoes (with cumin and garlic powder this time) and peas to go with this.
The only thing I think I would change is that I was dice the apples to get a more thorough cooking. The first 1/4" or so got cooked fine, but if I had waited for the whole halves to get cooked through, the bottom would have become mush. I already made some changes to the original while I was cooking.
As you can see in the photo, I made potatoes (with cumin and garlic powder this time) and peas to go with this.
Sauteed Apples & Pork Medallions with Pan Sauce
Ingredients
2 Granny Smith apples, halved
2 pork medallions (or you can slice your own pork tenderloin, about 1/4" thick)
2 Tbsp flour
1/2 tsp cumin
salt & pepper
1 Tbsp minced garlic
1 Tbsp oil (I used vegetable oil)
1 Tbsp butter
1/2 cup chicken broth
1 Tbsp white wine vinegar
Equipment
stove, pan with high-ish sides, have your plates ready
Instructions
Put oil and butter in pan on medium heat. Sprinkle your apples with salt & pepper on the cut sides. In the meantime, mix flour, cumin, and some salt & pepper. Lightly coat the pork medallions and set aside. Once butter is melted, stir it up and add apples, cut-side down. Cook until they look approximately like the picture (about 5 minutes). Remove them and put on plates. Add pork medallions to the pan and cook about 4-5 minutes on each side (until done). Set aside on plates. Add chicken broth and white wine vinegar to the pan and scrape up any bits from the bottom. After about a minute, add minced garlic and cook for another 2-3 minutes until it reduces a bit. Pour pan sauce over pork and serve.
Yields
2 servings
Total time
about 30 minutes (although I started the potatoes earlier, because they took about 45 minutes)
Cleanup rating 2/5
One of the amazing things about making a pan sauce (other than the incredible flavor it yields) is that deglazing the pan does the "hard" work of cleaning the pan for you! Instead of scrubbing off all the little bits afterward, you just put delicious liquid into the pan and it turns those bits into food! Although, with all the oil and apple juice and broth and meat juices and butter going on, there was quite a bit of splatter (I may have used a bit too much oil) so that made a little bit of a mess.
Difficulty rating 4/10
Actually quite easy. The hardest thing was trying to determine when things were done. I'm pretty sure I've never cooked pork (which is weird, but chicken is just so easy) and I've certainly never sauteed apple halves, so I was a little lost the whole time. Cubing the apples would have made the whole thing a lot easier.
Flavor rating 7/10
YUM. The apples were a little weird (again, they only got half-cooked I think, so cubing would help... or at least slicing). But the pork was very good, and the pan sauce was delicious. (I added the garlic on a whim, and I'm ever so glad that I did. I would probably have added a little finely diced onion if I had remembered that there was half an onion in the fridge. And maybe used a splash of wine too.)
NEW CATEGORY!!!
Adjustability: high
Obviously, I've already mentioned that the apples were too big. And that I messed with the pan sauce quite a bit (and would do so even more in the future). So this new category will help consolidate all of these ideas. Low adjustability means I don't think I would change anything, or I don't know how. Medium adjustability means I could change one or two things, or I wouldn't change it very much. High adjustability means the possibilities are endless, and/or I have lots of ideas of what to change in future attempts.
NEW CATEGORY!!!
Make it with
This category will tell you what I did make to go with the recipe, or what I might consider making with it. I already mentioned that this one was made with potatoes (with cumin and garlic) and peas. I might also make rice, and any green vegetable you like... broccoli might be good.
Labels:
30 minutes,
adjustability:high,
cleanup:easy,
difficulty:draw,
flavor:win,
fruit,
pork,
stove
Tuesday, May 13, 2014
Accidental Cookies
So, remember how I was making a ton of Mothers' Day cookies? Well, I screwed up the dough for the raspberry cookies (I forgot to add the sugar... thank goodness I tasted the dough before folding in the raspberries!). I tried to go back and add the sugar and re-mix it, but it turned into a firm dough ball that would not take raspberries well. So I saved it until later, and made these "accidental" cookies! Then I decided that they needed a little something... so I made a lime icing.
Accidental Cookies with Lime Icing
Ingredients
1/2 cup sugar
2 cups flour
2 tsp baking powder
8 Tbsp (1 stick) butter, not softened, cubed
2/3 cup heavy whipping cream
lime juice (about 2 Tbsp? I didn't measure)
powdered sugar (about 1/2 cup? I didn't measure)
Equipment
baking sheet, parchment paper, mixer, oven
Instructions
Preheat oven to 350F. Mix flour and baking powder together. Add butter and knead together by hand. You should get a crumbly mixture. Add the heavy cream and mix thoroughly (with a spoon should be fine). Add the sugar (if you want to be exactly like me, swear loudly about forgetting to add the sugar in the first place). Knead really thoroughly until all the sugar is incorporated. Pinch off small balls of dough and place on parchment-paper-lined baking sheet. Bake about 15 minutes. Let them cool thoroughly on a cooling rack. Mix lime juice and powdered sugar, adjusting amounts until you have the consistency of icing you want. Drizzle over cookies.
Yields
I got about 2 dozen cookies
Total time
Hard to tell, since I made these around making the raspberry cookies, but probably about 30 minutes including 15 minutes baking time.
Cleanup rating 2/5
Any time I'm working with powdered sugar will be no lower than a 2/5. But the dough is really clean, because it's a firm ball of dough instead of a crumbly mess.
Difficulty rating 5/10
Kneading by hand is a pain in the butt. Especially since I did it twice in a row (this batch, then doing it correctly for the raspberry cookies). And getting the icing consistency right is tricky.
Flavor rating 6/10
Birk says the cookies have a biscuit-y feel/flavor, and I don't disagree. But I like them, and it means they aren't too sweet. The lime icing is pretty tart, and I like that too. I feel like this recipe has some tweaking in its future.
Labels:
30 minutes,
baking,
cleanup:easy,
cookies,
dessert,
difficulty:draw,
flavor:draw,
meatless,
oven
Sunday, May 11, 2014
Gluten-Free Chocolate Cookies
These are the cookies I made for my stepmom! She's gluten-free, and she loves chocolate, so I jumped on this recipe when I found it.
Gluten-Free Chocolate Cookies
Ingredients
1/2 cup butter (softened)
1/2 cup brown sugar
1/2 cup white sugar
1 egg
1 tsp vanilla
1/2 tsp baking soda
1/2 tsp salt
1 cup cocoa powder
1/2 cup chocolate chips
1/2 cup butterscotch chips
Equipment
oven, baking sheets, parchment paper, cooling racks, mixer
Instructions
Preheat oven to 350F. Mix together butter, brown sugar, and white sugar. Add egg and vanilla; mix thoroughly. Combine baking soda, salt, and cocoa powder, and mix into wet batter (be careful not to make chocolate clouds that choke you). Stir in the chocolate and butterscotch chips. They will expand while baking, so give them some room on the parchment-lined baking sheet (about 1-1.5" should do). Bake for 10-12 minutes.
Yields
I got about 15 cookies out of it, but they were pretty big cookies.
Total time
A little under 30 minutes.
Cleanup rating 3/5
Chocolate everywhere. Delicious batter that I know I shouldn't lick off the spoon and beaters and bowl because it has raw egg, but yummy anyway. Definitely an instance of "clean immediately or regret it."
Difficulty rating 5/10
Not hard, but there is skill and patience required when baking cookies. Mixing, measuring carefully, fully incorporating ingredients... it might help to know that I use a hand mixer, so it's a tiny bit trickier than using a stand mixer.
Flavor rating 3/10
Disappointment. I hope my stepmom liked them more than I did. They are INCREDIBLY sweet. And I have an insane sweet tooth... but this is ridiculous. I washed down a bite with some Coke and it made the Coke taste bland like water. Still, though... chocolate. So it's not like a 1 or 2.
Additional note: The original recipe called for white chocolate chips instead of butterscotch ones, and mentioned that you can also add 1/2 cup of chopped walnuts (which I had, leftover from Mom's walnut butter balls, but I was fairly certain that my stepmom and I agree that nuts are great but they don't belong in our baked goods).
Labels:
30 minutes,
baking,
cleanup:hard,
cookies,
dessert,
difficulty:draw,
flavor: lose,
holiday,
meatless,
oven
Walnut Butter Balls
Happy Mothers' Day! I made cookies for my mothers this year... a different kind for each mother, according to their tastes.
For my mom, I made Walnut Butter Balls. The criteria for Mom were (1) I had to be able to mail it across the country without too much damage; (2) she likes nuts in her cookies/brownies/whatnot; (3) preferably no chocolate (only because it would melt in the mail, not because she doesn't like it).
While I was making them, I thought they smelled kind of like Christmas... and they look kind of like snowballs! Maybe they just remind me of rum balls (without rum) but I think these will get a repeat around Christmas.
The original recipe is from here.
Walnut Butter Balls
Ingredients
1 stick of butter, softened
1/2 cup powdered sugar
another 1 cup powdered sugar
1 cup flour
1 cup chopped walnuts
pinch of salt
1 tsp vanilla extract
Equipment
oven, parchment paper, baking sheet, cooling rack, mixer
Instructions
Soften your butter in a large bowl (I let it sit out for about 30 minutes). Preheat oven to 350. Add 1/2 cup powdered sugar to butter and beat with mixer until creamy. (Beware of sugar clouds.) Add flour, walnuts, salt, and vanilla and beat until incorporated. It will be pretty crumbly. Take tiny handfuls of batter and squeeze it together to get the air out. Squeeze into balls and set on parchment-paper-lined baking sheet. You don't need to give them a lot of room; they won't expand much. Bake 15-20 minutes. They'll be pale but firm (not squishy). Let them cool on the pan for a few minutes. Put about 1 cup powdered sugar in a bowl. While the cookies are still warm, roll them around in the sugar to coat them and set them on the cooling rack. Once you've done all the cookies, start again from the beginning and roll each one a second time.
Yields
I probably got about 20 cookies.
Total time
Prep + baking + sugar coating = about 30 minutes. Plus 30 minutes for butter softening, so about an hour.
Cleanup rating 2/5
Powdered sugar everywhere. Other than that, you just have a mixing bowl to clean (put parchment paper under your cooling rack to catch all that powdered sugar).
Difficulty rating 5/10
Not the easiest cookies to make, but certainly not difficult, either. It takes some patience and attention to mix the butter and sugar properly (and without making it sugar-snow all over the kitchen). And making the balls takes a little talent and a little patience. Otherwise, not too difficult.
Flavor rating 7/10
Birk loved them. I'm typing this up before Mom gets them so I don't know yet what she thinks of them. I thought they were pretty good, but I'm not a nutty cookie person, so they aren't my favorite. But they're good.
For my mom, I made Walnut Butter Balls. The criteria for Mom were (1) I had to be able to mail it across the country without too much damage; (2) she likes nuts in her cookies/brownies/whatnot; (3) preferably no chocolate (only because it would melt in the mail, not because she doesn't like it).
While I was making them, I thought they smelled kind of like Christmas... and they look kind of like snowballs! Maybe they just remind me of rum balls (without rum) but I think these will get a repeat around Christmas.
The original recipe is from here.
Walnut Butter Balls
Ingredients
1 stick of butter, softened
1/2 cup powdered sugar
another 1 cup powdered sugar
1 cup flour
1 cup chopped walnuts
pinch of salt
1 tsp vanilla extract
Equipment
oven, parchment paper, baking sheet, cooling rack, mixer
Instructions
Soften your butter in a large bowl (I let it sit out for about 30 minutes). Preheat oven to 350. Add 1/2 cup powdered sugar to butter and beat with mixer until creamy. (Beware of sugar clouds.) Add flour, walnuts, salt, and vanilla and beat until incorporated. It will be pretty crumbly. Take tiny handfuls of batter and squeeze it together to get the air out. Squeeze into balls and set on parchment-paper-lined baking sheet. You don't need to give them a lot of room; they won't expand much. Bake 15-20 minutes. They'll be pale but firm (not squishy). Let them cool on the pan for a few minutes. Put about 1 cup powdered sugar in a bowl. While the cookies are still warm, roll them around in the sugar to coat them and set them on the cooling rack. Once you've done all the cookies, start again from the beginning and roll each one a second time.
Yields
I probably got about 20 cookies.
Total time
Prep + baking + sugar coating = about 30 minutes. Plus 30 minutes for butter softening, so about an hour.
Cleanup rating 2/5
Powdered sugar everywhere. Other than that, you just have a mixing bowl to clean (put parchment paper under your cooling rack to catch all that powdered sugar).
Difficulty rating 5/10
Not the easiest cookies to make, but certainly not difficult, either. It takes some patience and attention to mix the butter and sugar properly (and without making it sugar-snow all over the kitchen). And making the balls takes a little talent and a little patience. Otherwise, not too difficult.
Flavor rating 7/10
Birk loved them. I'm typing this up before Mom gets them so I don't know yet what she thinks of them. I thought they were pretty good, but I'm not a nutty cookie person, so they aren't my favorite. But they're good.
| Bonus photo: cookies pre-sugaring. |
Labels:
60 minutes,
baking,
cleanup:easy,
cookies,
dessert,
difficulty:draw,
flavor:win,
holiday,
meatless,
oven
Sunday, May 4, 2014
Raspberry Lime Cookies
I promised cookies for a party. I made brown sugar cookies last week, intending the same thing, but I missed the gathering, so I ate a lot of the cookies myself. And I'm making the brown sugar cookies again for a work thing next week. So I thought I should probably make something different for tonight! (And I made them early enough that if they turned out badly, I still had time to make... brown sugar cookies.)
Raspberry-Lime Cookies
Ingredients
2 cups fresh raspberries
juice of 1/2 a lime (or 1.5 Tbsp ReaLime)
1.5 Tbsp sugar
another 1/2 cup sugar
2 cups flour
2 tsp baking powder
8 Tbsp (1 stick) butter, cubed (not softened)
2/3 cup heavy whipping cream
3/4 powdered sugar
1.5 Tbsp milk
Equipment
oven, cookie sheet, parchment paper, cooling racks, two bowls (one small, one large)
Instructions
Preheat oven to 350F. In a small bowl, combine raspberries, lime juice, and 1.5 Tbsp sugar. In a large bowl, whisk together flour, 1/2 cup sugar, and baking powder. Add the butter and mix together with your hands (it should be a crumbly mixture when you're done). Add cream and mix together. Fold in raspberries (try your best not to smush them, but a little smushing is inevitable). Line a cookie sheet with parchment paper and put spoonfuls of batter about 1" apart. Bake for 15 minutes (I left them for another 2 or 3 minutes, but I'd check on them at 15, anyway.) Let them cool on cooling racks. Mix powdered sugar and milk together and drizzle on cooled cookies.
Yields
I got nearly 2 dozen cookies, and a few of my spoonfuls were a little big.
Total time
I had to make two batches (only one rack in the oven right now) so it took an extra 15 minutes, but it takes about 30 minutes overall.
Cleanup rating 4/5
I made a mess... you might make less of a mess. But I got raspberry juice, lime juice, flour, and powdered sugar everywhere. It helped that I put parchment paper under the cooling racks before adding the icing, but there was still quite a mess to clean up.
Difficulty rating 4/10
You need to be able to mix the flour mixture with the butter properly (not too lumpy), not destroy the raspberries, not over- or under-bake them... etc. Plus, you should make sure each spoonful has an appropriate mixture of dough and berries and is cohesive enough to stay a cookie.
Flavor rating 6/10
They're a little tart (possibly because I changed the original recipe I found from lemon juice to lime juice, and I used ReaLime instead of a... real lime) but they're still pretty good. Maybe a little less lime juice, or a little more sugar in the first step?
Labels:
30 minutes,
baking,
cleanup:hard,
cookies,
dessert,
difficulty:draw,
flavor:draw,
meatless,
oven
Wednesday, April 23, 2014
Samosa Filling
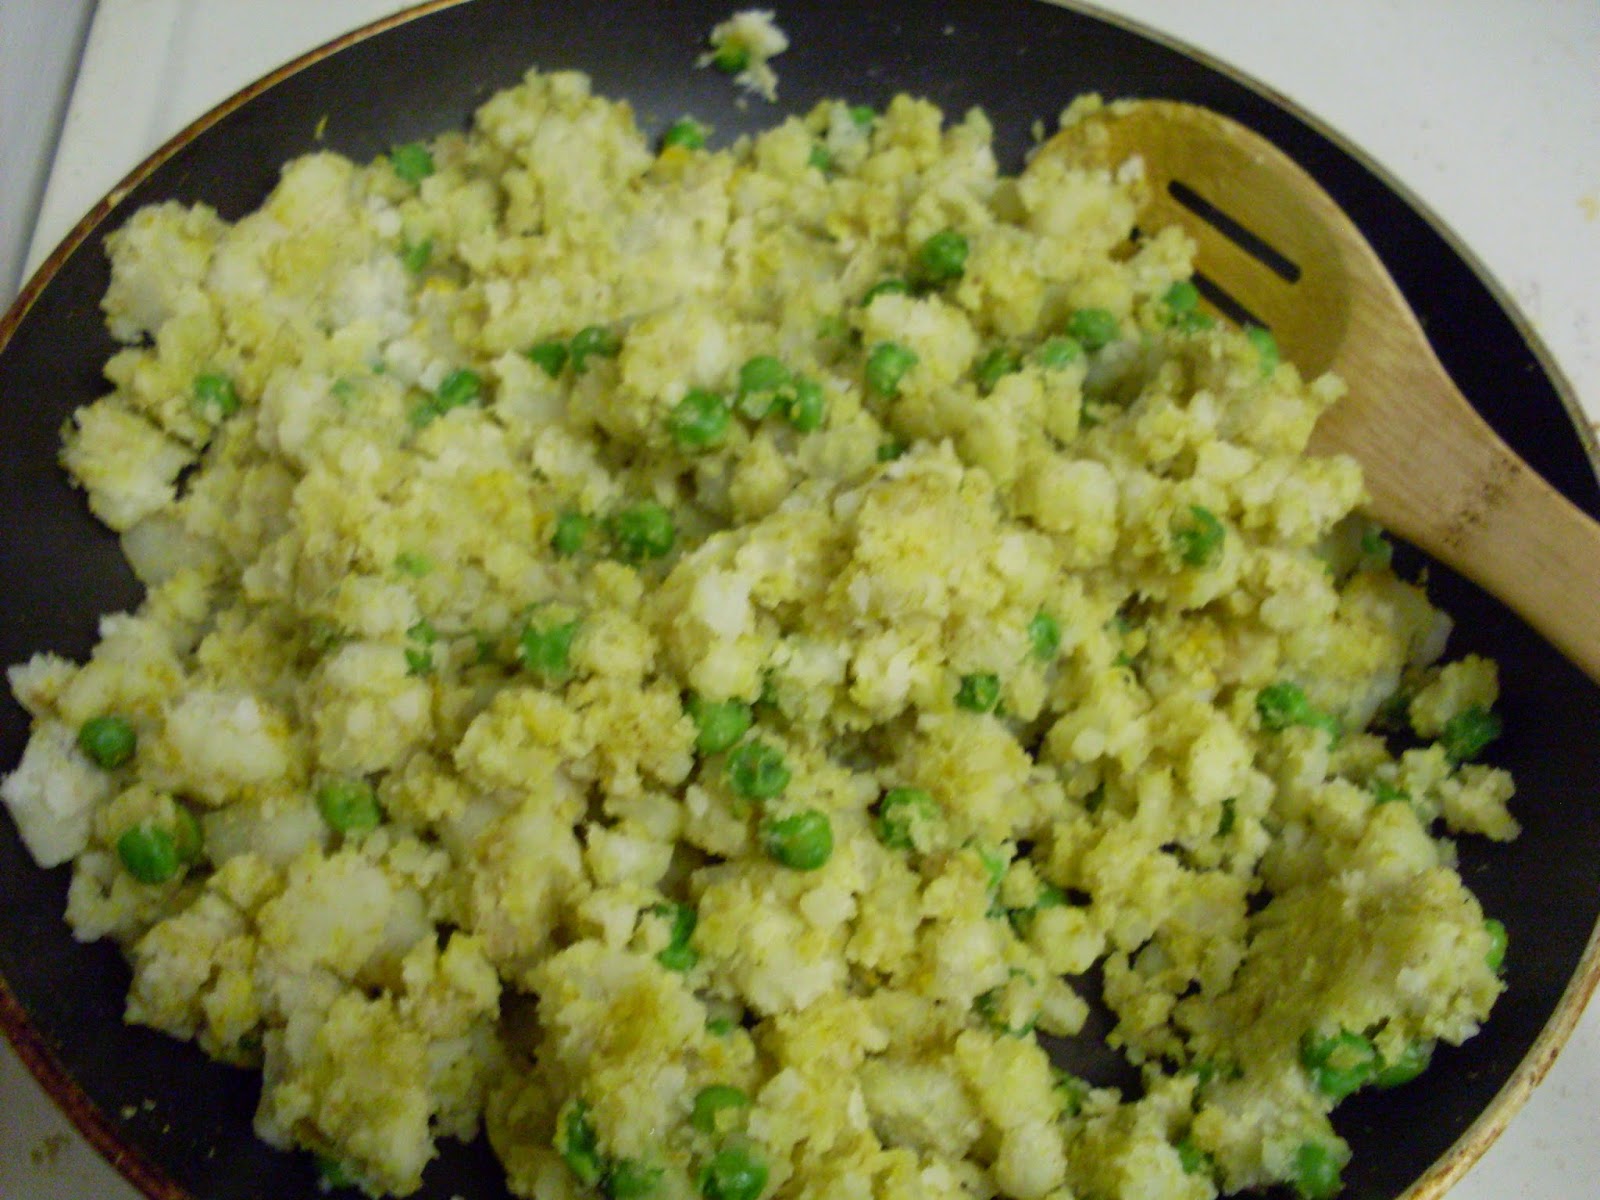
The plan was to make samosas with the butter chicken. But they didn't have samosa wrappers (or even a satisfactory stand-in, like egg roll wrappers) at the store, so I decided to just make the filling, which is kind of like Indian mashed potatoes. It's actually pretty close to aloo tikki.
Samosa Filling
Ingredients
two large potatoes
3 oz peas
turmeric
garam masala
coriander
ginger
1 Tbsp vegetable oil
Equipment
pot with lid, skillet, stove
Instructions
Peel, quarter, and boil the potatoes. (This takes so much longer than I thought it would; plan ahead! Mine took about half an hour because I didn't cut them into small enough pieces.) Drain the potatoes and mash them (I used a fork). Heat oil in a skillet. Add cumin and ginger; heat through. Add potatoes, peas, mix thoroughly. Add spices (about 1 tsp each). Mix thoroughly; heat through.
Yields
About 4 servings
Total time
FOREVER. Don't try to boil big pieces of potato when you're starving. It took about an hour total.
Cleanup rating 2/5
Very easy to clean the pan after; nothing sticks to it.
Difficulty rating 5/10
Half of the difficulty for me lay in waiting for potatoes to boil. The rest is pretty simple.
Flavor rating 5/10
It was a little bland. It definitely needed salt (potatoes suck up all the salt, but you can't taste it... Always confuses me.) I think it would have been better inside samosas.
Samosa Filling
Ingredients
two large potatoes
3 oz peas
turmeric
garam masala
coriander
ginger
1 Tbsp vegetable oil
Equipment
pot with lid, skillet, stove
Instructions
Peel, quarter, and boil the potatoes. (This takes so much longer than I thought it would; plan ahead! Mine took about half an hour because I didn't cut them into small enough pieces.) Drain the potatoes and mash them (I used a fork). Heat oil in a skillet. Add cumin and ginger; heat through. Add potatoes, peas, mix thoroughly. Add spices (about 1 tsp each). Mix thoroughly; heat through.
Yields
About 4 servings
Total time
FOREVER. Don't try to boil big pieces of potato when you're starving. It took about an hour total.
Cleanup rating 2/5
Very easy to clean the pan after; nothing sticks to it.
Difficulty rating 5/10
Half of the difficulty for me lay in waiting for potatoes to boil. The rest is pretty simple.
Flavor rating 5/10
It was a little bland. It definitely needed salt (potatoes suck up all the salt, but you can't taste it... Always confuses me.) I think it would have been better inside samosas.
Labels:
60 minutes,
cleanup:easy,
difficulty:draw,
flavor:draw,
meatless,
stove
Butter Chicken
Last night, I made two Indian dishes for dinner. It was a bit of an undertaking for a mid-week dinner, but hey, there are sufficient leftovers for a complete second meal!
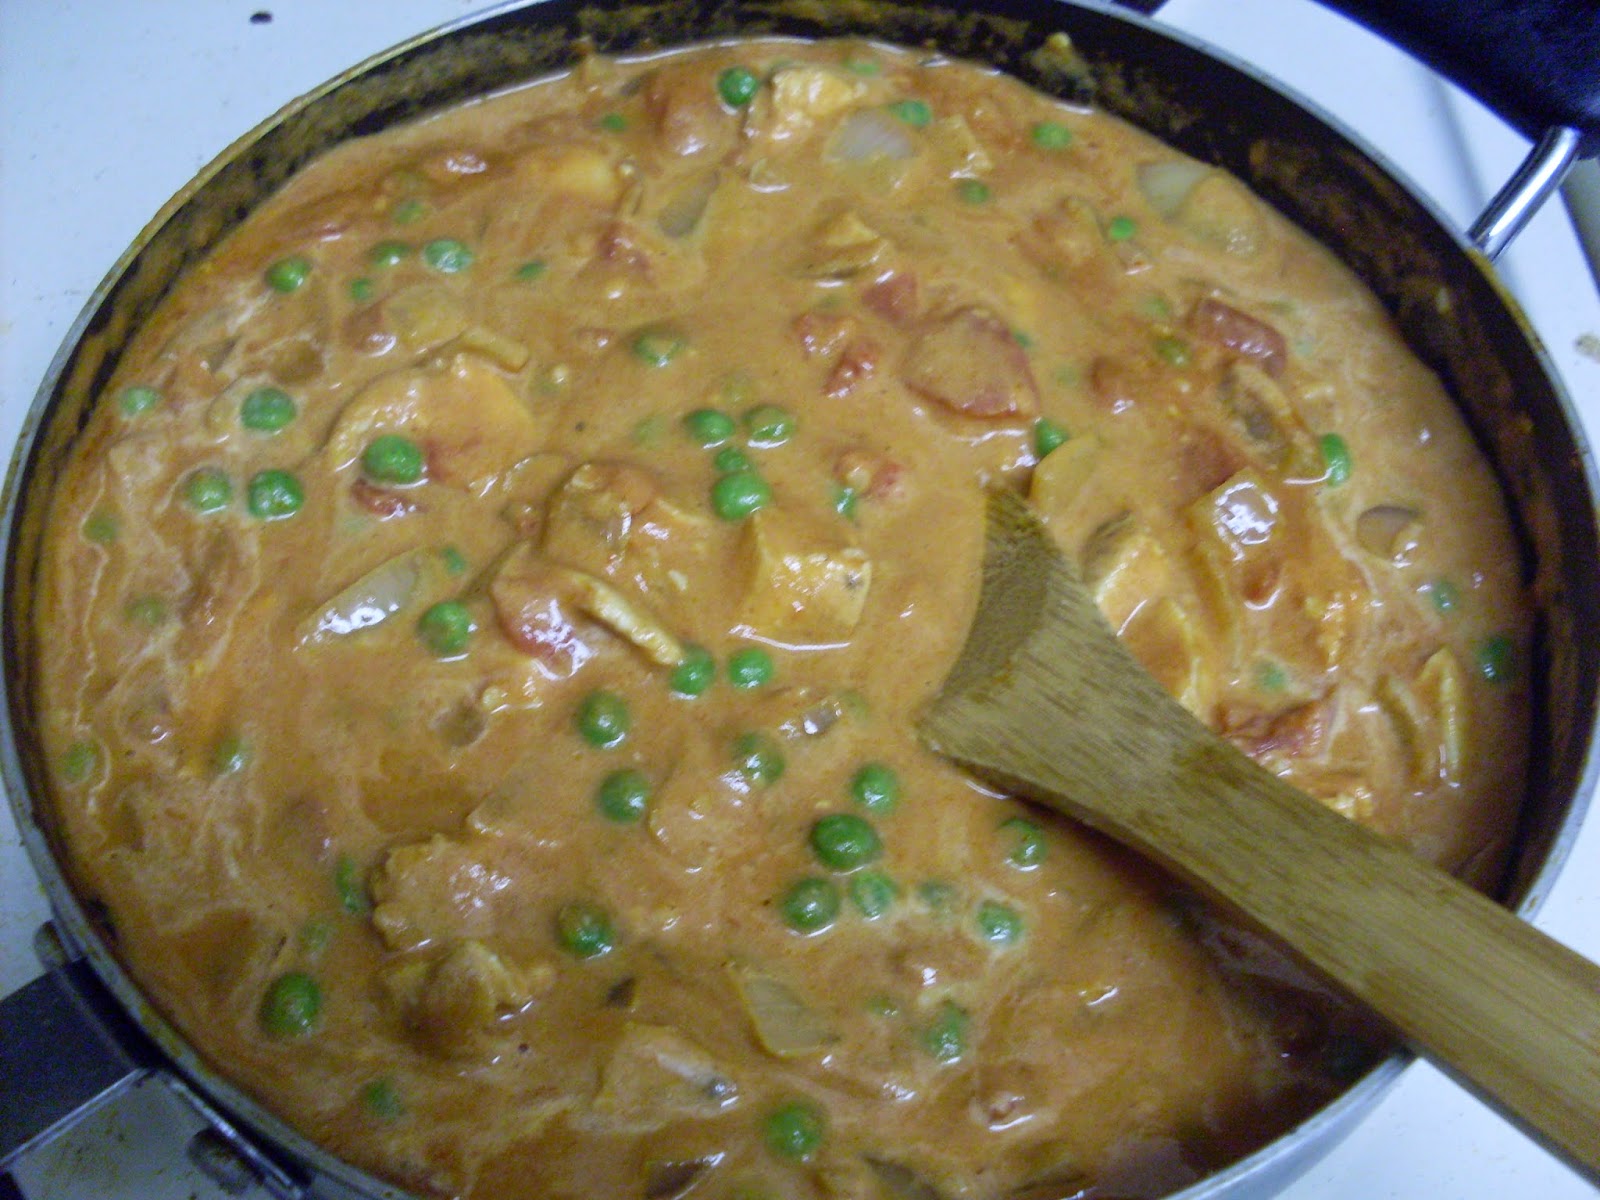
The main dish was butter chicken (which has so much more tomato in it than anything else, I think it should be called tomato chicken). I found a recipe online and made my own adjustments to it, so I know this is like... Alex-ized butter chicken. Go with it.
Butter Chicken (which I think should be called tomato chicken)
Ingredients
3 chicken breast filets
garam masala
coriander
ground ginger
cinnamon
2 tsp minced garlic
8 oz peas (I got a steam-in bag and nuked them)
3 Tbsp butter
15 oz can of diced tomatoes in juice
14.25 oz can of tomato sauce
1 Tbsp tomato paste
1/3 cup heavy whipping cream
1/2 an onion, diced
Equipment
skillet, stove
Instructions
Cook your chicken. Technically this should be made with baked or rotisserie or tandoori chicken, but I made mine like this but with garam masala and some salt. Take out your chicken and let it cool and absorb its juices for a while. (This is time I spent paying attention to the samosa filling.) Dice your onion. Melt butter in the pan and add onion, cooking until they're golden. Add the garlic, tomato paste, and about 1/2 tsp each of garam masala, coriander, ginger, and cinnamon. Stir constantly for a few minutes, until well blended. Add the diced tomatoes and tomato sauce, mix thoroughly, let it heat through. Add the chicken and let it heat through. Add the peas and cream, mix thoroughly, let it heat through but don't boil.
Yields
SO MUCH. Probably about six servings.
Total time
30 minutes if you're making it by itself*
Cleanup rating 3/5
It can be a messy dish, but it's mostly tomato sauce so it comes off fairly easily when you clean it right after dinner.
Difficulty rating 4/10
There are a lot of ingredients to keep track of, but if you play the cooking show game (set out all your ingredients ahead of time) it's a lot easier.
Flavor rating 7/10
I had never had butter chicken before, so I don't know how accurate I was, but I thought it was good. I think we could do without the diced tomatoes (I like tomato sauces but not pieces of tomato) so I'll probably experiment with this one in the future.
*I made this with samosa filling so it actually took about an hour to make dinner.
The main dish was butter chicken (which has so much more tomato in it than anything else, I think it should be called tomato chicken). I found a recipe online and made my own adjustments to it, so I know this is like... Alex-ized butter chicken. Go with it.
Ingredients
3 chicken breast filets
garam masala
coriander
ground ginger
cinnamon
2 tsp minced garlic
8 oz peas (I got a steam-in bag and nuked them)
3 Tbsp butter
15 oz can of diced tomatoes in juice
14.25 oz can of tomato sauce
1 Tbsp tomato paste
1/3 cup heavy whipping cream
1/2 an onion, diced
Equipment
skillet, stove
Instructions
Cook your chicken. Technically this should be made with baked or rotisserie or tandoori chicken, but I made mine like this but with garam masala and some salt. Take out your chicken and let it cool and absorb its juices for a while. (This is time I spent paying attention to the samosa filling.) Dice your onion. Melt butter in the pan and add onion, cooking until they're golden. Add the garlic, tomato paste, and about 1/2 tsp each of garam masala, coriander, ginger, and cinnamon. Stir constantly for a few minutes, until well blended. Add the diced tomatoes and tomato sauce, mix thoroughly, let it heat through. Add the chicken and let it heat through. Add the peas and cream, mix thoroughly, let it heat through but don't boil.
Yields
SO MUCH. Probably about six servings.
Total time
30 minutes if you're making it by itself*
Cleanup rating 3/5
It can be a messy dish, but it's mostly tomato sauce so it comes off fairly easily when you clean it right after dinner.
Difficulty rating 4/10
There are a lot of ingredients to keep track of, but if you play the cooking show game (set out all your ingredients ahead of time) it's a lot easier.
Flavor rating 7/10
I had never had butter chicken before, so I don't know how accurate I was, but I thought it was good. I think we could do without the diced tomatoes (I like tomato sauces but not pieces of tomato) so I'll probably experiment with this one in the future.
*I made this with samosa filling so it actually took about an hour to make dinner.
Labels:
30 minutes,
chicken,
cleanup:draw,
difficulty:draw,
flavor:win,
stove
Subscribe to:
Posts (Atom)