I didn't take a picture of this dinner, but I've made it several times before. In fact, I was surprised to find that I hadn't posted it here before.
Chicken and Onions
Ingredients
two boneless, skinless chicken breasts
one large onion, sliced
olive oil
salt, pepper, paprika, garlic powder
Equipment
oven
Instructions
Preheat the oven to 450F. Line a baking dish with foil (this recipe can stick to a pan and hold on for dear life). Put the chicken and the sliced onions in the dish and drizzle with olive oil. Toss to coat. Sprinkle with seasonings of your choice (I like garlic on everything, and paprika gives it a nice color). Bake for about 30 minutes.
Yields
2 servings
Total time
30 minutes
Cleanup rating 3/5 if you use foil
If you don't use foil, have fun scrubbing onion bits off your dish. Been there; done that. Now I only make this dish with foil.
Flavor rating 7/10
Sometimes I overcook this. Sometimes I undercook it. When I get it right, it's a 7/10. When I don't, it's like a 3.
Difficulty rating 2/10
So simple. Surprising, considering I just admitted to screwing it up sometimes.
Adjustability: medium
You can add other veggies, or use different seasonings, but that's about all there is to it.
Make it with...
This time I made it with rice in the rice cooker that I added shredded gouda to (try it, it's great). You can make it with mashed potatoes, or noodles, or any veggie side dish... it's really versatile, because it really just boils down to being chicken, seasoned however you want.
Kitchenventory
Cabinet: nothing
Fridge: chicken breasts
Countertop: onion, olive oil
Spice rack: seasonings
Miscellaneous: foil
Tuesday, December 2, 2014
Chicken Noodle Soup
One of my dad's favorite pastimes is to try making dinner without going grocery shopping. He likes the challenge of using what is already in the kitchen to make a meal. I don't have quite the knack for it that he does, but he has several years' worth of experience on me, so I don't mind.
However... I have to admit that I did a pretty amazing job yesterday.
I was cleaning out one of the cabinets (as part of the kitchenventory) and found an old can of chicken noodle soup... old enough that I didn't want to eat it. But it sounded good. So I thought, "Oh, I'll go to Panera on my way to work and get some soup for lunch." But then I thought, "There's chicken in the fridge, and I just pulled half a bag of egg noodles out of this cabinet." Lo and behold, I had the stuff to make an actual chicken noodle soup in the Crockpot.
This is a recipe where I'm listing what I had and used, but it's very versatile, so make substitutes all over the place.

Yields
5-6 servings... I'm working my way through the leftovers now.
Total time
7-8 hours (prep time about 5 minutes)
Cleanup rating 4/5
If you don't use a slow cooker liner, slow cookers can be a pain to clean. But at least it's only one dish. Still, this has lots of little bits of things and if you don't lick the pot clean, you have to clean little bits of things off of it.
Difficulty rating 2/10
Make sure you remember to pull out the chicken and shred it and put in the noodles on time, but otherwise, this is super easy.
Flavor rating 8/10
It might be because this was exactly what I wanted or because I skipped lunch, but this was DELICIOUS.
Adjustability: high
Since this was an on-the-fly recipe, that kind of defines it as an adjustable recipe. Use whatever vegetables and seasonings you have on hand. Have more chicken broth? Use it; I had about three cups, so that's what I used. Have vegetable broth instead? Go for it.
Make it with...
Nothing or anything. This was a hearty meal on its own and didn't need anything to go with it.
However... I have to admit that I did a pretty amazing job yesterday.
I was cleaning out one of the cabinets (as part of the kitchenventory) and found an old can of chicken noodle soup... old enough that I didn't want to eat it. But it sounded good. So I thought, "Oh, I'll go to Panera on my way to work and get some soup for lunch." But then I thought, "There's chicken in the fridge, and I just pulled half a bag of egg noodles out of this cabinet." Lo and behold, I had the stuff to make an actual chicken noodle soup in the Crockpot.
This is a recipe where I'm listing what I had and used, but it's very versatile, so make substitutes all over the place.
Chicken Noodle Soup (Slow Cooker)
Ingredients
two boneless, skinless chicken breasts
about 3 cups of chicken broth
about 3 cups of water
half a packet of onion soup mix
half a bag of baby carrots
half a bag of frozen peas
half a bag of frozen green beans
salt, pepper, shallot-pepper seasoning
half a bag of egg noodles
Equipment
slow cooker
Instructions
Place the chicken in the bottom of the slow cooker. Cover with the veggies and liquids. Cook on low for 6-7 hours (mine went about 8 because of work schedule). Take out the chicken and shred it with a fork (this should be really easy, it'll just fall apart) and put it back in. Add the noodles and let it cook for another 20-30 minutes. Add more liquid if you feel like it needs it.
Yields
5-6 servings... I'm working my way through the leftovers now.
Total time
7-8 hours (prep time about 5 minutes)
Cleanup rating 4/5
If you don't use a slow cooker liner, slow cookers can be a pain to clean. But at least it's only one dish. Still, this has lots of little bits of things and if you don't lick the pot clean, you have to clean little bits of things off of it.
Difficulty rating 2/10
Make sure you remember to pull out the chicken and shred it and put in the noodles on time, but otherwise, this is super easy.
Flavor rating 8/10
It might be because this was exactly what I wanted or because I skipped lunch, but this was DELICIOUS.
Adjustability: high
Since this was an on-the-fly recipe, that kind of defines it as an adjustable recipe. Use whatever vegetables and seasonings you have on hand. Have more chicken broth? Use it; I had about three cups, so that's what I used. Have vegetable broth instead? Go for it.
Make it with...
Nothing or anything. This was a hearty meal on its own and didn't need anything to go with it.
Sunday, November 30, 2014
Kitchenventory
Yup, I made up a new word: kitchenventory. This is my list of stuff to keep in the kitchen or at least keep tabs on (for example, we don't need to always have beer brats in the fridge, but I use them pretty often, so I need to know whether we have some in the fridge or if I need to pick some up).
I've broken the list down into where things go in the kitchen: cabinet, fridge, freezer, counter top, and spice rack. There's also the miscellaneous list (for non-food items like foil and paper towels) and the non-kitchen list (for things like cat food and cat litter and toilet paper).
Cabinet
dry pasta, rice, flour, sugar, brown sugar, salt, baking powder, baking soda, bouillon (chicken, beef, and vegetable), tortillas, hot sauce, vanilla, vinegar, diced tomatoes, tomato paste, tomato sauce, Worcestershire sauce, balsamic vinegar, soy sauce, bbq sauce, onion soup mix, brown gravy mix, syrup, Pam, sriracha, Bisquick, canned pineapple
Refrigerator
Always: butter, Parmesan, wonton wrappers, wine (white and red)
Sometimes: chicken breasts, ground beef, stew meat, pork tenderloins, bacon, sour cream, bell peppers, carrots, raw spinach, green onions, cheese, zucchini, beer brats, milk, eggs, mushrooms, cucumbers
Freezer
peas, edamame, spinach, corn
Countertop
potatoes, onions, garlic, sweet potatoes, avocado, apples, vegetable oil, olive oil, sesame oil
Spice Rack
garlic powder, onion powder, paprika, cumin, salt & pepper, cayenne, basil, oregano, Italian seasoning, red pepper flakes
Miscellaneous
aluminum foil, slow cooker liners, dish soap, dishwasher detergent, paper towels, Ziploc (quart and sandwich sizes)
Non-kitchen
cat food, cat litter, toilet paper, naproxen, Tylenol, cleaning products, toothpaste (and toothbrushes), laundry detergent
I'm sure that changes will be made (additions, removals, replacements) but this looks pretty solid to me so far. If I had enough of these ingredients in the kitchen, I could feed us for at least a month and not get bored with food.
Sunday, November 23, 2014
French Onion Soup

French Onion Soup
Ingredients
3 large yellow onions (slice 'em up)
4 Tbsp butter
1 cup white wine (I used pinot grigio)
42 oz beef broth
Salt and pepper
bread
shredded cheese (I used Gouda)
Equipment
slow-cooker, skillet, stove
Instructions
Melt the butter in the skillet. Add onions and saute until they're soft and a little bit browned. Add the wine. Pour it into the slow-cooker with the beef broth, and a dash of salt and pepper. Cook on low for 4-5 hours. Toast the bread lightly. Serve in bowls with bread on top, cheese on top of that, and add a little more soup on top of the cheese to melt it all together.
Yields
4-6 bowls of soup
Total time
4.5 hours: About 15 minutes of prep, 4 hours in the slow-cooker, 10 minutes to finish off
Cleanup rating 4/5
Slow-cooker recipes always have higher cleanup ratings. We didn't like this enough to keep the leftovers, so I strained the liquid out of it with a colander into the sink, and threw out the remaining onion pieces. Plus you have more dishes than you normally get from a slow-cooker recipe: skillet, knife and cutting board, and the five billion tears from cutting up so much onion at once.
Difficulty rating 3/10
There are many steps, but none of them are particularly difficult. You do need to try to get the onion slices approximately the same size for even cooking, but that's probably the trickiest part.
Flavor rating 4/10
Meh. I don't really know what went wrong with it, but it just wasn't very good. The wine flavor was pretty strong, which is not what I want out of a French onion soup. I think that was the biggest problem. I would cut down on the wine.
Adjustability: low
There isn't much to French onion soup. There's onions, liquid, then bread and cheese. It's rare for "peasant food" to not be very adjustable, but this one doesn't have much of anywhere to go. Different onions, different wine, different broth, different bread, different cheese, but they're all the same basic ingredients. For what it's worth, the gouda worked really well, even though the original recipe suggested Swiss.
Make it with...
I made it with beer mushrooms, sauteed beer brats with garlic, and potatoes. It could be its own meal, or go with all sorts of things.
Beer Mushrooms
You know what's awesome? Beer. You know what else is awesome? Mushrooms. But guess what wasn't double-awesome? These beer mushrooms. They were okay.
Ingredients
Total Time
about 30 minutes
Cleanup rating 2/5
The thing about making something with a lot of butter and leaving it in the pan while you eat dinner is that it gets that fatty stuff all over the pan. I think it's kind of gross, but it's easy to clean up.
Difficulty rating 2/10
Patience factors into difficulty, which is the only reason this isn't a 1/10.
Flavor rating 3/10
Meh. I like mushrooms. I like beer. (At least, I like the beer I used for this.) I didn't really like this.
Adjustability: low
Use a different beer (the original recipe recommended a stout, maybe that was part of my problem) or use different mushrooms, maybe add some other herbs/seasonings, but that's about all you can do.
Make it with...
I made this to go along with French onion soup, sauteed beer brats with garlic, and potatoes (they were sliced this time to make them cook a little faster). You could make them with just about anything... chicken, pork, beef, vegetarian meals, whatever.
 |
| Beer + mushrooms = beer mushrooms |
 |
| That's them, on the right, with beer brats and potatoes. |
Ingredients
8 oz mushrooms
2 Tbsp butter
1/2 cup beer
salt and pepper
Equipment
skillet, stove
Instructions
Melt butter in a skillet. Add mushrooms. Add beer. Cook for about 30 minutes, letting the mushrooms absorb all the beer. Salt and pepper to taste.
Yields
3-4 servings
Total Time
about 30 minutes
Cleanup rating 2/5
The thing about making something with a lot of butter and leaving it in the pan while you eat dinner is that it gets that fatty stuff all over the pan. I think it's kind of gross, but it's easy to clean up.
Difficulty rating 2/10
Patience factors into difficulty, which is the only reason this isn't a 1/10.
Flavor rating 3/10
Meh. I like mushrooms. I like beer. (At least, I like the beer I used for this.) I didn't really like this.
Adjustability: low
Use a different beer (the original recipe recommended a stout, maybe that was part of my problem) or use different mushrooms, maybe add some other herbs/seasonings, but that's about all you can do.
Make it with...
I made this to go along with French onion soup, sauteed beer brats with garlic, and potatoes (they were sliced this time to make them cook a little faster). You could make them with just about anything... chicken, pork, beef, vegetarian meals, whatever.
Wednesday, November 12, 2014
Caesar Salad
You may be saying, "Alex, you haven't posted in a couple weeks, and here you bring us a salad? That's not cooking." To that, I say: I can't hear you, and calm your face, because this salad was delicious.

Caesar Salad
Ingredients
romaine lettuce
croutons (ours are Parmesan Caesar)
bacon
chicken (got a rotisserie chicken, rosemary & garlic)
Parmesan cheese
Caesar dressing
Equipment
colander or salad spinner, cutting board and knife, microwave if your bacon isn't cooked, bowls
Instructions
You've made a salad before, right? Wash and pat dry your lettuce (I hate a watery Caesar, and it can make your croutons soggy, which is just the worst) and divide it into bowls. Cut up your chicken into bite-size pieces. Microwave your bacon according to package instructions. Assemble salads. Smile.
Yields
Depends on how much of each ingredient you use, of course.
Total time
10 minutes
Cleanup rating 1/5
You aren't even cooking. Absolute maximum of dishes to clean is your colander or salad spinner, cutting board, knife, maybe a plate you cooked bacon on, and your bowls/forks.
Difficulty rating 1/10
Even with the required skill of knowing how to efficiently dissect a rotisserie chicken (which I left up to Birk while I did the other prep), it doesn't get much easier than this.
Flavor rating 7/10
It's a classic dish. Chicken Caesar salad. Can't go wrong.
Adjustability: high
Use steak, shrimp, turkey, tofu, or nothing instead of chicken and bacon. Use a different type of lettuce. Instead of croutons, use nuts or Parmesan crisps or some other crunchy little thing. Try different dressings (although then I guess it's not so much a Caesar...)
Make it with...
Everything. With the chicken in it, it's a fine entree on its own. If it hadn't been so quick and I hadn't been so hungry, I would have roasted some potatoes and onions with it, or sauteed chicken breasts to go alongside it instead of cutting up rotisserie chicken to put on top of it. Go nuts.

Birk picked up Ken's Steakhouse creamy caesar dressing a while back, and it's now my favorite Caesar dressing in a bottle. (The best Caesar anywhere is the one at The Melting Pot, but I don't dare try to copy it... I just eat it once a year and love it.) It's a pretty big bottle, so you might see Caesar show up again sometime on here.
Caesar Salad
Ingredients
romaine lettuce
croutons (ours are Parmesan Caesar)
bacon
chicken (got a rotisserie chicken, rosemary & garlic)
Parmesan cheese
Caesar dressing
Equipment
colander or salad spinner, cutting board and knife, microwave if your bacon isn't cooked, bowls
Instructions
You've made a salad before, right? Wash and pat dry your lettuce (I hate a watery Caesar, and it can make your croutons soggy, which is just the worst) and divide it into bowls. Cut up your chicken into bite-size pieces. Microwave your bacon according to package instructions. Assemble salads. Smile.
Yields
Depends on how much of each ingredient you use, of course.
Total time
10 minutes
Cleanup rating 1/5
You aren't even cooking. Absolute maximum of dishes to clean is your colander or salad spinner, cutting board, knife, maybe a plate you cooked bacon on, and your bowls/forks.
Difficulty rating 1/10
Even with the required skill of knowing how to efficiently dissect a rotisserie chicken (which I left up to Birk while I did the other prep), it doesn't get much easier than this.
Flavor rating 7/10
It's a classic dish. Chicken Caesar salad. Can't go wrong.
Adjustability: high
Use steak, shrimp, turkey, tofu, or nothing instead of chicken and bacon. Use a different type of lettuce. Instead of croutons, use nuts or Parmesan crisps or some other crunchy little thing. Try different dressings (although then I guess it's not so much a Caesar...)
Make it with...
Everything. With the chicken in it, it's a fine entree on its own. If it hadn't been so quick and I hadn't been so hungry, I would have roasted some potatoes and onions with it, or sauteed chicken breasts to go alongside it instead of cutting up rotisserie chicken to put on top of it. Go nuts.
Saturday, October 25, 2014
Game of Thrones Dinner: Honeyed Chicken and Spiced Squash
I know, I disappeared from this blog for a while... Sorry! But I haven't been cooking as much because I've been doing... everything else.
Last Saturday, Beth and Chris and I entered a cosplay contest at Tidewater Comicon... and we won best group! In celebration of our cosplay (Melisandre, Margaery, and Oberyn) I wanted to make an easy dinner for everyone from the Inn at the Crossroads. I wanted to make olive bread but the timing didn't work out very well, so this is what we wound up with:

Ingredients
a squash (I used butternut)
1/2 cup maple syrup
1/4 tsp nutmeg
1 tsp cinnamon
1/4 tsp allspice (I skipped this because we didn't have any)
Equipment
sauce pan, stove, baking sheet, oven
Instructions
Cut up the squash into approximately 1" pieces. Preheat the oven to 375F. Heat the maple syrup in a pan with the spices for about 3 minutes, stirring constantly (do not let it boil). Remove it from the heat. Arrange your squash pieces on a baking sheet (I highly recommend lining it with foil first). Pour the sauce over the squash, coating the pieces as evenly as possible. Bake until tender, about 20 minutes. If you managed to reserve any sauce, heat it in the last few minutes and pour it over the squash when you take it out of the oven.
Yields
Two fairly big butternut squashes fed me and five friends, and the sauce was just the right amount.
Total time
This only took about half an hour, with Birk cutting up the squash while I worked on the sauce for the chicken.
Cleanup rating 2/5
Not bad, but you are heating maple syrup in a pan. I'd recommend using all the sauce on the squash to begin with, and cleaning the pan immediately, while the squash is in the oven. And if you follow my advice about lining the baking sheet with foil, it'll make it 10x better.
Difficulty rating 3/10
I learned that butternut squash is pretty tough to cut; it's kind of like a sweet potato. Beyond that, this is a very simple recipe... it's like a sweet version of my potatoes!
Flavor rating 7/10
I don't eat a lot of squash, but maybe I should start. This was really good. It's excellent for fall weather! I think I might mount an effort to get squash everywhere instead of pumpkin. (Nothing against pumpkin, I'm just not a big fan of it in everything... just pie, really.)
Adjustability: low
There are only so many spices that would go well on a squash, and there are only so many types of squash, and that's all you could really change, because that's all you're using.
Make it with...
Of course, I made it with the honeyed chicken, which was an amazing combination. But I think you could make it with anything that you consider a fall or winter meal. It's a side dish that plays well with others. And it's an excellent and easy vegan dish if you have guests with dietary considerations at the holidays. (It's also gluten-free unless you have a really weird maple syrup.)
Last Saturday, Beth and Chris and I entered a cosplay contest at Tidewater Comicon... and we won best group! In celebration of our cosplay (Melisandre, Margaery, and Oberyn) I wanted to make an easy dinner for everyone from the Inn at the Crossroads. I wanted to make olive bread but the timing didn't work out very well, so this is what we wound up with:
I made a pressed-for-time (some might call it "lazy") version of Honeyed Chicken. I cheated and used pre-made rotisserie chickens, but I made the sauce. I also made Spiced Squash with it (I used the modern recipe, but used butternut squash that was growing in the yard so I wouldn't have to buy acorn squash). And to pull it all together, I threw together a green salad out of what the in-laws had growing outside: a couple different types of lettuce, spinach, tomato, and some red onion Birk chopped up while I was out picking everything else.
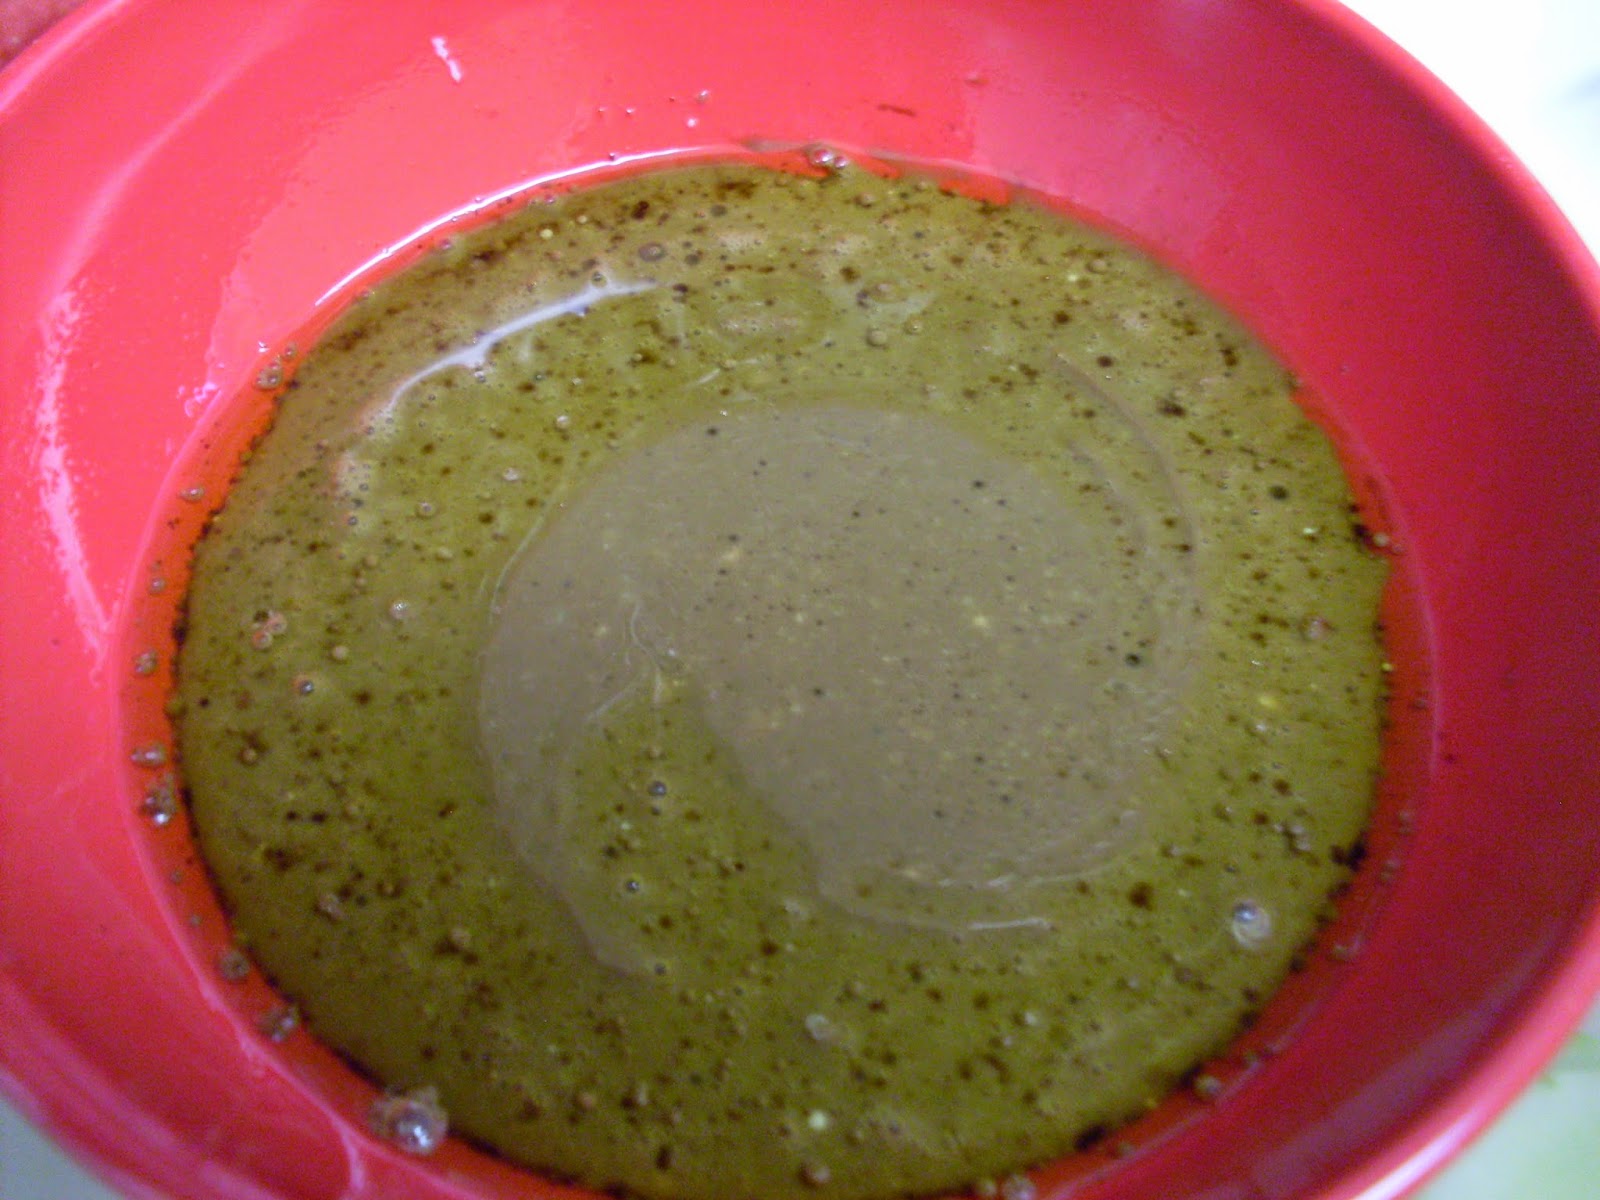
Sauce for Honeyed Chicken
Ingredients
1/2 cup apple cider vinegar
1/3 cup honey
dash of mint (I had to use dried)
handful of raisins
1 Tbsp butter
Equipment
saucepan, spoon, measuring cup, stove
Instructions
Combine everything in a pan and cook until the raisins start to plump. Pour it over the chicken when it's done. (Yes, it's that simple!)
Yields
I actually doubled the recipe since, as you can see in the photo, I had two chickens. (I was channeling the Hound, I guess.) But the recipe makes plenty for one full chicken.
Total time
For the sauce, maybe 10 minutes total. I was reheating the chickens so that took about 30 minutes.
Cleanup rating 2/5
I expected something with this much honey to be a huge mess, but it wasn't bad. I recommend cleaning out your pan pretty quickly though, because it does that thing where the fat floats on the top if you don't use all the sauce, and I think that's kinda gross. And rinse out your measuring cup with really hot water right after you measure the honey, and that'll be less of an issue later.
Difficulty rating 2/10
It's a really simple recipe. Even if you had to roast a chicken from scratch, I wouldn't put this over a 5/10. The timing is easy, the cooking is easy... you do need to be able to keep an eye on it, but I had Birk around for that.
Flavor rating 6/10
I thought it was a little heavy on the apple cider vinegar, but everyone else said it was good. I think it went really well with the already-seasoned rotisserie chicken, so the flavor plays well with others. And I'm pretty sure some of the vinegariness went away as the sauce cooled.
Adjustability: low
Other than adding herbs, I don't know how I could change this, but I also don't know why I would. It's basic and yummy.
Make it with...
Obviously, chicken. I don't see any reason you couldn't make it with turkey instead. I wouldn't use it with other meats, or with anything other than poultry.
Spiced Squash
Ingredients
a squash (I used butternut)
1/2 cup maple syrup
1/4 tsp nutmeg
1 tsp cinnamon
1/4 tsp allspice (I skipped this because we didn't have any)
Equipment
sauce pan, stove, baking sheet, oven
Instructions
Cut up the squash into approximately 1" pieces. Preheat the oven to 375F. Heat the maple syrup in a pan with the spices for about 3 minutes, stirring constantly (do not let it boil). Remove it from the heat. Arrange your squash pieces on a baking sheet (I highly recommend lining it with foil first). Pour the sauce over the squash, coating the pieces as evenly as possible. Bake until tender, about 20 minutes. If you managed to reserve any sauce, heat it in the last few minutes and pour it over the squash when you take it out of the oven.
Yields
Two fairly big butternut squashes fed me and five friends, and the sauce was just the right amount.
Total time
This only took about half an hour, with Birk cutting up the squash while I worked on the sauce for the chicken.
Cleanup rating 2/5
Not bad, but you are heating maple syrup in a pan. I'd recommend using all the sauce on the squash to begin with, and cleaning the pan immediately, while the squash is in the oven. And if you follow my advice about lining the baking sheet with foil, it'll make it 10x better.
Difficulty rating 3/10
I learned that butternut squash is pretty tough to cut; it's kind of like a sweet potato. Beyond that, this is a very simple recipe... it's like a sweet version of my potatoes!
Flavor rating 7/10
I don't eat a lot of squash, but maybe I should start. This was really good. It's excellent for fall weather! I think I might mount an effort to get squash everywhere instead of pumpkin. (Nothing against pumpkin, I'm just not a big fan of it in everything... just pie, really.)
Adjustability: low
There are only so many spices that would go well on a squash, and there are only so many types of squash, and that's all you could really change, because that's all you're using.
Make it with...
Of course, I made it with the honeyed chicken, which was an amazing combination. But I think you could make it with anything that you consider a fall or winter meal. It's a side dish that plays well with others. And it's an excellent and easy vegan dish if you have guests with dietary considerations at the holidays. (It's also gluten-free unless you have a really weird maple syrup.)
Monday, July 21, 2014
Olive Bread
Beth and Chris and Christopher made this (among other delicious things) for my bachelorette party. Several weeks back, Tara mentioned how good it was, and something along the lines of how you can't find bread like that in stores or anything. So I thought I'd make some to bring for dinner this past weekend!
Olive Bread
 |
| Ignore the Little Visitor Damson... Turns out I forgot to take a photo of just the bread. |
Olive Bread
from Inn at the Crossroads
Ingredients
6.5 cups flour
1.5 Tbsp yeast
1.5 Tbsp kosher salt
1 Tbsp honey
1/4 cup olive oil
2 3/4 cup lukewarm water
1 cup chopped pitted Kalamata olives
1 sprig chopped rosemary
1/4 cup corn meal
Equipment
LARGE bowl, plastic wrap, oven, baking sheet
Instructions
In the bowl, combine 1/2 cup of the flour, yeast, and 1 cup of the water. Let it sit for 10 minutes. (I used this time to chop the olives up.) Add the salt, honey, oil, rest of the flour and water. Mix (I used a spoon) until the dough starts to come together; add olives and rosemary. Keep mixing until all the loose flour is incorporated. Cover loosely with plastic wrap. Let it rise for 1.5 hours. (It's supposed to expand a lot, so have a bowl big enough for that! Mine didn't expand THAT much, but I spilled some yeast...)
Dust two baking sheets with corn meal. Divide the dough (it should be sticky) into pieces (I did half; if yours rises more, thirds works too) and pull the edges under until you have a ball-shape. Set them on the baking sheets. Let them rise another 30 minutes while you preheat the oven to 450F. Slash the tops with a serrated knife (I totally forgot to do this and it wasn't devastating). Place them in the oven and bake for 30 minutes. The crust should be medium brown (see photo) and firm (I tapped it with a table knife and got a lovely hollow-ish sound).
Yields
I made two loaves; I believe when Beth made it, she got three.
Total time
about 3 hours
Cleanup rating 4/5
The dough is sticky, both of my loaves stuck a tiny bit to the pan, and you have to measure some messy stuff (I got flour everywhere, somehow, and honey is always a pain, though delicious).
Difficulty rating 6/10
For bread, this is insanely easy. It's a no-knead bread, and I managed to ace it on my first try, so it really is ridiculous how easy it is... for bread. But it's an involved process with lots of steps, and whenever you're baking, you have to be very accurate with your measuring.
Flavor rating 8/10
I love this stuff. But I like olives. Birk doesn't like olives; he isn't fond of this bread. Should go without saying, I suppose. The original post says you won't have a single bite without an olive bit in it, and I have found this to be absolutely true. You've got a basic white bread with a great crust (not thick, not hard) and salty little olive bits everywhere, and a hint of rosemary.
Adjustability: low
Maybe someone who's more accustomed to making bread would be able to adjust this recipe more, but this is the first time I've made real bread. (Sure, I made that honey beer bread, but that felt more like a hybrid biscuit-and-cake.) Maybe there are other things with similar density to olives that you could put in the dough? Use something other than rosemary to flavor it? I'm not really sure.
Make it with...
By chance, it went perfectly with what we had for dinner Saturday (a sausage-tomato-cream sauce on rigatoni). It's also a wonderful stand-alone snack. If I were having a wine-and-cheese party, I'd slice this up and set it right next to the cheese plate. It's a hearty bread but not terribly filling, so it goes with a ton of things.
Churro Bites
I made these as a quick-and-easy dessert to take to dinner with friends, since I was also busy making olive bread as a surprise for them.

Churro Bites
inspired by this post
Ingredients
box of angel food cake mix (or if you have a good recipe, make one from scratch)
several Tbsp cinnamon (throw in some Vietnamese cinnamon if you want it strong!)
several Tbsp sugar
Equipment
oven and cake pan (if you need to make your cake), cutting board, knife, bowl
Instructions
Make your angel food cake according to package instructions. Allow it to cool completely. Mix sugar and cinnamon in a bowl. Cut the cake into bite-sized cubes. Roll each cube thoroughly in the sugar and cinnamon (tap them to shake off the excess).
Yields
a whole cake's worth
Total time
about an hour; check the instructions on your cake box; mine took 30 minutes, and I let it cool for about 30 minutes outside of the pan
Cleanup rating 3/5
You'll get cinnamon and sugar everywhere, but that's relatively easy to clean up. Other than that, you only have a few things to clean (bowl, pan, knife, cutting board). My hands always get a thin stickiness on them from working with angel food cake, though. Wash everything thoroughly! (Like you should anyway.)
Difficulty rating 3/10
Any idiot can bake an angel food cake. (You literally preheat the oven, mix the box of powder with the prescribed amount of water, pour it into a pan, and put it in the oven.) Letting it cool is a matter of not doing things, and cutting it up is less difficult than I expected (I had a fantastically sharp knife, though). Just don't try to rub your eyes while your fingers are coated in cinnamon. Not a good idea.
Flavor rating 7/10
Angel food is my favorite cake (it's like a giant, fluffy, marshmallow... but cake!) and I love cinnamon sugar, so this is pretty awesome. The original recipe called for frying the cake cubes in oil, which would have given them that awesome crispy churro texture, but I had neither the time nor the inclination to fry them. Some of the feedback I got (all positive) was that they're strong, and you so often get cinnamon-flavored desserts that barely taste like cinnamon at all. (I shared the secret: Vietnamese cinnamon.)
Adjustability: low
I don't know what else to do to these things. You could fry them like in the original post, or make an icing to drizzle on top or dip in, but that's about all I can think of. If you use a different type of cake, it would probably get too crumbly.
Make it with...
Everything. I originally decided to make them when we were going to have fish tacos for dinner, but it worked equally well with sausage-tomato-cream sauce and rigatoni. It would work with just about anything, I think. Or as a stand-alone dessert.
Friday, July 11, 2014
Lemon Cucumber
This isn't a recipe... this is a "hey did you know this thing existed?" I introduce to you... the lemon cucumber.
It was delicious and I hope to have more in the future. My mother-in-law sent me home with this one after Independence Day dinner because I saw one cut in half on the counter and had to ask about it.
 |
| This is a lemon cucumber. The "lemon" comes from the look, the "cucumber" comes from everything else: flavor, smell, etc. |
 |
| Cut open; NOW it looks like a cucumber. This one smelled pretty strongly of cucumber when I cut it open, too. Yummy! It had more seeds than a usual cucumber too; I don't know if that's typical of these guys or if it's just the one I got. |
 |
| When I try a new vegetable or fruit, I like to eat it by itself so I'm not influenced by other flavors when deciding if I like it. I just washed this little guy, cut it up, and salted it as a side dish. |
It was delicious and I hope to have more in the future. My mother-in-law sent me home with this one after Independence Day dinner because I saw one cut in half on the counter and had to ask about it.
I haven't been eating cucumbers with the skin on for a long time (since I had them growing in my back yard, actually; I peel cucumbers that come from the store) so I don't know if it was the skin or just a difference between this and other cucumbers, but it was very crunchy. And I usually cut that many seeds out of a normal cucumber but these weren't as bad as normal-cucumber-seed-abundance.
French Croutons
The only "French" thing about these croutons is that I learned how to make croutons on the stove (as opposed to in the oven) when I was in France last year. I didn't follow a recipe or use particularly French ingredients or anything like that. I just had some bread leftover from this day, and decided to try this out... and I was pleased with the results.

"French" Croutons
Ingredients
Bread, cubed
butter
seasonings
shredded Parmesan (I used a four-cheese blend that included Parmesan and Romano)
Equipment
pan, stove
Instructions
Melt butter in your pan on medium heat. (I probably used about 2-3 Tbsp for the amount of bread I had, pictured above). Once it's melted, add your bread cubes. Toss them around to get them thoroughly coated. Season them and toss again for even coating. Once they're just about to your desired level of toastiness (remember, I like my croutons a little chewy, so in my picture, they aren't really crunchy yet) add the cheese and toss until it melts onto the croutons (be careful not to let too much melt onto the pan; it can burn pretty quickly).
Total time
about 10 minutes... be patient while waiting for them to toast; you don't want to burn them!
Yields
As much bread as you throw in there
Cleanup rating 2/5
You'll have a mildly greasy pan, but if you don't let anything burn, it'll be a breeze to clean. You don't even have a bowl/bag to deal with like you do with my other croutons!
Difficulty rating 3/10
If being patient is difficult for you, this is a little difficult. And you need to keep an eye on them; don't turn away for too long or something (bread, cheese, seasonings) might burn.
Flavor rating 8/10
YUM. It's hard to go wrong with butter, bread, and cheese (hey, that actually does sound pretty French... just add some wine!).
Adjustability: medium
You'll notice I didn't specify seasonings. Honestly, I made this a little while ago and can't remember what I used. I know there was garlic powder involved, because there always is. And I'm pretty sure I used my Parisian spice blend (...French) which has some dry leafy seasonings in there, and I was concerned about burning. But use whatever bread, spices, and cheese you want! Add other things! Leave out the cheese!
Make it with...
In the bonus photo, you'll see the croutons were their own individual side dish. You could put them on a salad like normal croutons, or make them smaller and use them in a Grenobloise style dish (that's why I learned it in France... we made skate Grenobloise, with capers and croutons and lemon juice). You could also just make them as a snack. Put some of these next to a cheese plate and glass of wine? Perfection.
Bonus photo:
 |
| Made them with sauteed chicken with red wine mushroom "relish," garlic mashed potatoes, and peas. |
Wednesday, July 2, 2014
Cheesesteaks
I'm pretty sure I've never been to Philadelphia (therefore, if I have, I don't remember it) so go easy on me here, okay? I just like sandwiches. Don't try to tell me this isn't a proper cheesesteak... I'm from the south; I'm not expected to get these things right.

Cheesesteaks
Ingredients
green pepper
onion
mushrooms
ground beef
sliced provolone
bolillo rolls
about 2 Tbsp butter
Equipment
pan, foil, baking sheet, stove, oven
Instructions
Cut up your veggies into pieces that are an appropriate size to put on a sandwich. (I mention this specifically because I made mine a little big... they shrink a little while they cook, but not that much.) Melt butter in a pan and cook the veggies on medium-high until they start to get little char marks on them. Move the veggies to a bowl to wait while you cook the ground beef thoroughly in the pan. Drain your ground beef (I set out a paper plate covered in paper towels and pour the meat onto it, pat it down with a couple more paper towels) and put it back in the pan. Add the veggies back to the pan and mix thoroughly. Turn the heat to low. Once the veggies are heated through, spread the mixture evenly in the pan and cover with slices of provolone. Preheat the oven to 250F. Once the cheese is melted, scoop the mixture into sliced bolillo rolls. Wrap each sandwich very very tightly in foil and set on the baking sheet. Bake for about 10 minutes.
Yields
I got 5 sandwiches out of one package of ground beef, one pepper, one onion, and a few button mushrooms. If we had used bigger rolls, it would have been 4.
Total time
about 30 minutes
Cleanup rating 1/5
Using one pan for the veggies and the meat makes cleanup even easier. Since the sandwiches are wrapped tight in foil, they don't leak onto the pan, so that doesn't even need to be cleaned.
Difficulty rating 2/10
These are not hard... they're just a little more time-consuming than a sandwich usually is. I was playing on hard-mode because my thumb hurt (have you ever cut your thumb by opening shampoo? I have) but still... not hard.
Flavor rating 6/10
Pretty good. I feel like there's something missing, or maybe I just should have used actual steak, but they were good.
Adjustability: high
Switch up your veggies! Change your cheese! Use steak instead of ground beef! Try chicken or pork or turkey instead! Use a different bread! Season your meat with something crazy! Every ingredient can be changed, removed, or switched out for something else. You could even go against everything Philly stands for and just put the mixture on top of rice or mashed potatoes or something, I don't know.
Make it with...
I made potatoes, and I had some green beans on stand-by to make sauteed green beans if the timing was a little off (but it wasn't). I thought about potato chips, potato salad, something with avocado (I just couldn't decide what)... it's a sandwich! Make whatever you want with it.
Bonus photos:
 |
| Veggies should look pretty much like this when they're done sauteeing. Look at the little brown bits on some of them! YUM. |
 |
| Cheese is just about melted over the meat-and-veggie mixture. Almost time to transfer to the rolls. |
Monday, June 23, 2014
Croutons
My grandma (mom's mom) made the best homemade croutons. This is not her recipe. In fact, I don't think I have her recipe. But it's not the same if she didn't make them, y'know? These are my croutons... and they're rarely the same twice in a row, so it's one of those vague recipes.

Croutons
Ingredients
bread (I like baguettes for this)
olive oil
seasonings (these have garlic powder, paprika, shallot-pepper seasoning, and salt)
Equipment
foil, baking sheet, oven, bowl
Instructions
Preheat oven to 375F. (I like my croutons a little chewy. If you like crispier croutons, change that to 425F.) Cube your bread and put into the bowl. (Smaller cubes = crispier croutons.) Drizzle with olive oil; toss until evenly coated. Sprinkle with seasonings; toss until evenly coated. Spread evenly on a foil-lined baking sheet and bake for 15-30 minutes (check on them periodically; baking time is entirely up to you and your crunchiness preferences).
Yields
Depends on how much you cut up. I used half a demi-baguette to make what you see above.
Total time
20-30 minutes, depending on how long you want them to bake
Cleanup rating 1/5
Clean the bowl, toss the foil.
Difficulty rating 3/10
I was going to make it a 2/10 but then I remembered that one time I nearly cut off a finger because the knife slipped when I was cutting the bread, and I was very thankful that I'm terrible about sharpening my knives. So, you know... be careful with your knife. I'm serious.
Flavor rating 9/10
You can make them exactly the way you want, as far as seasoning, doneness, and size are concerned, and I love that. Plus they taste fresh, as opposed to the pre-packaged ones that now taste like over-flavored cardboard to me.
Adjustability: high
Cut them smaller or bigger, bake them less time or more, use whatever seasonings you want, add cheese or some other topping, use a different bread like cheese bread or jalapeno bread or olive bread or rye bread... go totally nuts on these things.
Make it with...
Well, I traditionally just put them on salads, but they make a great snack on their own, too. When I was in Paris last summer, we went to a cooking class where we made skate Grenobloise-style, which calls for lemon juice, capers, and croutons to garnish the skate, so that's something I had never done with croutons before. (Hers were cooked in butter in a skillet, too... but stay tuned for a recipe for croutons like that soon!)
Honey Mustard Dressing
I can't even try to introduce this one. I found it in an image on Pinterest (from Spark People but the image is here). Everything I want to say belongs in a section below, so here we go... honey mustard dressing.

Honey Mustard Dressing
Ingredients
1 1/2 Tbsp olive oil
3 Tbsp plain Greek yogurt
1/4 cup balsamic vinegar
1 Tbsp soy sauce
1 1/2 Tbsp Dijon mustard
1 1/2 Tbsp honey
Equipment
bowl, whisk
Instructions
Combine ingredients in a bowl and whisk until thoroughly incorporated.
Yields
Enough for maybe 4-5 salads? Maybe about 1/3 cup?
Total time
5 minutes
Cleanup rating 2/5
Lots of liquids to be measured so you need to clean your Tbsp several times (or have a bunch of them on hand and clean them all after).
Difficulty rating 1/10
Mix things in a bowl? That's literally all it is. Mix things in a bowl.
Flavor rating 5/10
What a weird honey mustard. Yeah, there's honey in it... and mustard, too. But that much balsamic vinegar makes it very weird, and the Greek yogurt is a little apparent for my tastes. Birk really liked it, which I guess is great, but I don't think I'll repeat this one. When I brought Birk his plate, he said, "I thought you were going to make honey mustard?" So it's obviously not your usual honey mustard... but not bad.
Adjustability: low
I wouldn't have a clue how to change this. I'd just find a new recipe if I wanted something different.
Make it with...
Well, it was good on our salad, which it was intended for. It might be good drizzled on fresh bread, too.
Bonus photos: Dinner was avocado chicken with potatoes and salad made of lettuce from our planter, cucumber, and homemade croutons.
Tuesday, June 17, 2014
Skillet Corn
I forgot to take a photo of this one. So I'm borrowing the photo from here, which is where I got the recipe from.
 |
| From here |
Before I made this, I didn't really know what creamed corn was. It just brought to mind a tin can of gelatinous goo with corn in it. (Turns out, I wasn't far off on that count.) But I described to a coworker this corn that I made over the weekend, and she said it sounded like creamed corn. So I guess creamed corn is actually pretty good. At any rate, the original recipe poster called this skillet corn, which sounds way more delicious than "creamed corn."
Skillet Corn
Ingredients
3 cups corn
1/2 tsp salt
pepper to taste
1 Tbsp sugar (I'm fairly certain I accidentally left this out)
1/2 cup water
1 Tbsp flour
1/4 cup milk
Equipment
skillet with lid, stove
Instructions
Put corn, salt and pepper, sugar, butter, and water in 10" skillet. Cover; simmer 15 minutes (stir occasionally). Combine flour with milk. Stir into corn. Cook another 5 minutes, stirring constantly.
Yields
about 3 cups of corn
Total time
20 minutes (negligible prep time, 15 minutes to simmer and 5 minutes to finish it off)
Cleanup rating 2/5
All you have to clean is a pan, spoon, and whatever bowl you put the corn in. And the measuring cup. Nothing sticky or anything; very simple.
Difficulty rating 3/10
Just make sure you stir constantly after you add the milk; I'm always very wary after adding milk to a hot pan because I know it can do weird, disgusting things. The rest is incredibly easy.
Flavor rating 5/10
Yum. It might have been better if I had remembered the sugar, but it was still good. It went perfectly with burgers and hot dogs on a beautiful-weather Father's Day.
Adjustability: low
I don't know what else you could do to it.
Make it with...
Well, like I said, it went great with cookout food. But it would also work with... pretty much anything. Chicken, beef, pork, whatever.
Rocky Road Cookies
These were so good. So sweet, but so good. Kind of like the GoT finale I made them for.

Rocky Road Cookies
Ingredients
3 cups powdered sugar
2/3 cup cocoa powder (unsweetened)
1/4 tsp salt
3 large egg whites
1 Tbsp vanilla extract
2 cups semisweet chocolate chips
2.5 oz sliced almonds (I used slivered because that's what I had)
1 cup mini marshmallows
Equipment
large bowl, baking sheet, parchment paper, oven, MUSCLES, freezer
Instructions
Preheat oven to 350F. In a large bowl, mix up your powdered sugar and cocoa. Whisk in the salt. Add the egg whites and vanilla; stir until combined. Stir in chocolate chips and almonds. (This is where the muscle comes in... it's a thick batter.) Spoon small mounds onto parchment paper and top with a few marshmallows (press them in a little to make sure they don't tumble off). Stick them in the freezer for a few minutes to prevent too much spreading when they bake. Put on a baking sheet (I didn't think it was a good idea to freeze the baking sheet itself) and bake about 12 minutes (until marshmallows are toasted like in the photo). Let them cool a few minutes on the pan before transferring to wire rack.
Yields
2 dozen cookies
Total time
about 30 minutes (I baked two batches, so about 10 minutes prep, and about 10 minutes for each batch to bake)
Cleanup rating 3/5
Chocolate everywhere. Powdered sugar more everywhere.
Difficulty rating 6/10
I'm not kidding about stirring that batter... it's thick. Don't be lazy about it, though; you want evenly distributed bits. And someone save you if you think whisking your wet ingredients in is a good idea. Your whisk will pick up all of the batter and be rendered useless.
Flavor rating 8/10
Really sweet but really yummy. Kind of sticky.
Adjustability: medium
Don't like almonds? Use pecans, or walnuts, or no nuts at all. Try mixing some marshmallows into the batter. Try cinnamon chips or butterscotch chips or caramel bits or toffee chips. I know rocky road has a specific definition but I've always thought of it as the "everything bagel" of desserts.
Make it with...
Nothing; it's a cookie. Our dinner was burgers and hot dogs on the grill with veggies. This seemed like an appropriately casual dessert for the occasion.
Subscribe to:
Posts (Atom)